How to Make a T-Shirt Pillow
Give new life to an old t-shirt by turning it into a comfy pillow!
Do you have an old t-shirt that you just absolutely love but you aren’t able to wear anymore? Whether you simply grew out of it or it’s developed a few random holes, you may not have to part with your favorite tee after all!
We have a wonderful way to upcycle that t-shirt into an awesome pillow! It’s a fun and easy project that you and your kids can do in no time. Not only that, but it’s also an activity that is crafty and creative!
Keep reading to learn how you can make a t-shirt pillow in just a few simple steps!

This article contains affiliate links to products that you might like.
T-Shirt Pillow Upcycle
Making a t-shirt pillow can be done quite easily. Below is a list of materials that you will need to complete this super fun upcycle project.
Materials:
- An Old T-shirt
- Fabric Scissors (regular scissors will work too)
- Needle and Thread or Sewing Machine
- Polyester Stuffing or Old Pillows
Instructions:
Step One: Cut the T-shirt
Lay the shirt flat on a clean surface. Cut off the neckline, and bottom hem and make a slit up each of the sides to separate the front and the back pieces.
Note: It’s best to cut the shirt slightly larger (like an inch or two) than the size you would like your pillow to be. This leaves room to sew later.
You can make your pillow in the shape of a square, a rectangle, or even a triangle if you’re feeling different!

Step Two: Prepare the Shirt for Sewing
Take the front and back pieces and turn them inwards, so the right sides are facing each other. If there is a design or image on the shirt, it will be facing inside.
Essentially the shirt will be inside out when sewing.
Make sure the edges line up, and get your needle and thread ready. You can also use a sewing machine if you have one, but sewing by hand works just as well.
Note: If sewing by hand, you can use a pen to draw lines where you want to sew. This can help you to sew in a straight line.
Step Three: Sew the Shirt
With the right sides of the shirt facing together and lined up, sew together three sides of the shirt pieces using a running stitch.
We like to go up one side, across the top, and down the other side.
Once the three sides are sewn together, turn the shirt right side out.
Note: The running stitch is a basic stitch that is created by passing the needle in and out of the fabric at a regular distance.
Step Four: Stuff the Shirt
Using either new polyester fill or stuffing from an old pillow, pull pieces of the fill apart and stuff it into the opening of the shirt.
Add as much filling as you would like to make either a super fluffy pillow or a thin pillow. We like medium fluff! 🙂
Keep going! You only have one more thing to do before your t-shirt pillow is complete!
Step Five: Close the Pillow
Once you feel that the pillow has enough stuffing, sew the open side (in our case, the bottom) with a running stitch to close the pillow. Again you can do this by hand or with a sewing machine.
Note: While we were sewing, we tucked the cut edges inside to give it a neater look when complete.
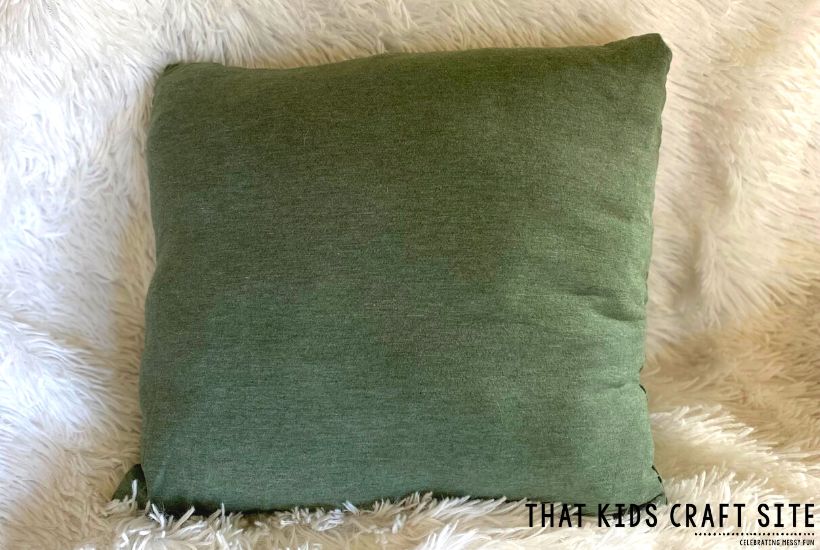
And there you have it! A do-it-yourself t-shirt pillow made by you.
Now that your homemade t-shirt pillow is complete, you have the option of adding decorations to it.
If there is already a graphic design on it, you may want to leave it as is.
If not, keep it plain or spruce it up a bit. You can add buttons, decorative stitches, or even color your own design on there with fabric markers.
The possibilities are endless!

DIY T-Shirt Pillow
This project is a quick and easy way to upcycle an old t-shirt and give it new life.
It makes the perfect decorative piece, and it doubles as a comfortable cushion for lounging.
Give it a try and see how many unique and cozy pillows you can create from your old tees!
Happy Making!
T-Shirt Pillow Craft

Turn those tired t-shirts into fluffy accessories with this easy craft!
Materials
- An Old T-shirt
- Fabric Scissors (regular scissors will work too)
- Needle and Thread or Sewing Machine
- Polyester Stuffing or Old Pillows
Instructions
Step One: Cut the T-shirt
Lay the shirt flat on a clean surface. Cut off the neckline, and bottom hem and make a slit up each of the sides to separate the front and the back pieces.
Note: It’s best to cut the shirt slightly larger (like an inch or two) than the size you would like your pillow to be. This leaves room to sew later.
You can make your pillow in the shape of a square, a rectangle, or even a triangle if you’re feeling different!
Step Two: Prepare the Shirt for Sewing
Take the front and back pieces and turn them inwards, so the right sides are facing each other. If there is a design or image on the shirt, it will be facing inside.
Essentially the shirt will be inside out when sewing.
Make sure the edges line up, and get your needle and thread ready. You can also use a sewing machine if you have one, but sewing by hand works just as well.
Note: If sewing by hand, you can use a pen to draw lines where you want to sew. This can help you to sew in a straight line.
Step Three: Sew the Shirt
With the right sides of the shirt facing together and lined up, sew together three sides of the shirt pieces using a running stitch.
We like to go up one side, across the top, and down the other side.
Once the three sides are sewn together, turn the shirt right side out.
Note: The running stitch is a basic stitch that is created by passing the needle in and out of the fabric at a regular distance.
Step Four: Stuff the Shirt
Using either new polyester fill or stuffing from an old pillow, pull pieces of the fill apart and stuff it into the opening of the shirt.
Add as much filling as you would like to make either a super fluffy pillow or a thin pillow. We like medium fluff! 🙂
Keep going! You only have one more thing to do before your t-shirt pillow is complete!
Step Five: Close the Pillow
Once you feel that the pillow has enough stuffing, sew the open side (in our case, the bottom) with a running stitch to close the pillow. Again you can do this by hand or with a sewing machine.
Note: While we were sewing, we tucked the cut edges inside to give it a neater look when complete.
And there you have it! A do-it-yourself t-shirt pillow made by you.
Now that your homemade t-shirt pillow is complete, you have the option of adding decorations to it.
If there is already a graphic design on it, you may want to leave it as is.
If not, keep it plain or spruce it up a bit. You can add buttons, decorative stitches, or even color your own design on there with fabric markers.
The possibilities are endless!