Spring Garland
Welcome Spring with a beautiful handmade flower Spring garland! It’s an easy and fun paper craft that kids of all ages will love!

Spring is on the way, so we thought we might welcome it with a beautiful paper craft flower garland activity.
This spring garland is really easy to make, and it will look gorgeous anywhere you hang it.
Whether you want to refresh the classroom or use it to decorate one of the kids’ rooms, this handmade spring garland is the perfect project to do.
Paper Garland
Paper garland is a wonderful craft activity to make with the little ones. They get to express their creativity, use their imagination, and build up those fine motor skills.
A pretty flower garland can be put together by simply using string or yarn, colorful construction paper, and an embroidery needle (used with supervision only!).
Join us as we walk you through how to make the prettiest spring garland!

This article contains affiliate links to products that you might like.
Paper Spring Garland Craft for Kids
Refresh the classroom by making a gorgeous spring flower garland. To create this paper spring garland, we will be cutting flowers out of colored construction paper.
Add in a few leaves, and this spring garland will wake up any space.
Let’s take a look at the materials you will need to create a stunning spring garland.
Materials:
- Construction Paper
- Scissors
- Embroidery Needle
- String or Yarn
- Hole Punch (optional)
Instructions:
Make the flowers:
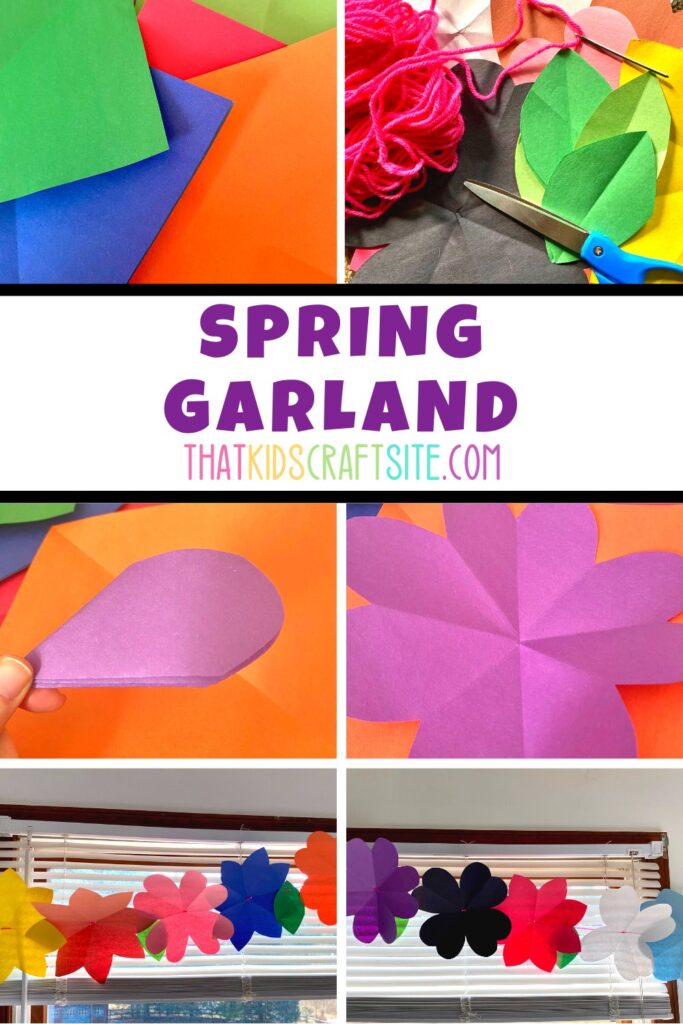
- Start out with a square piece of construction paper. Make a square by folding down one top corner to the opposite edge, forming a triangle. Cut off the excess paper (below the triangle). Then, unfold the triangle to reveal a perfect square.
- Now that you have a square piece of paper, fold it diagonally in half to form a triangle.
- Do it again to make a smaller triangle.
- Do it one more time for an even smaller triangle.
- Holding the folded corner, cut out a petal shape on the opposite side that you’re holding. Feel free to cut rounded petals, pointy petals, or both.
- If you desire, punch a small hole or two out of the center of the flower to make a place for the string later.
- Unfold, and you have a flower.
- Repeat the process until you have enough colorful flowers for your garland.
Make leaves:
- Fold a square piece of construction paper in half.
- Cut out a simple arc shape as you hold the folded side. If you’re feeling really creative, try your hand at more complex leaf shapes.
- If you would like, punch a hole or two out of the leaf to make a place for the string later.
- Unfold to reveal a leaf.
- Repeat until you have as many leaves as you want.

Create garland:
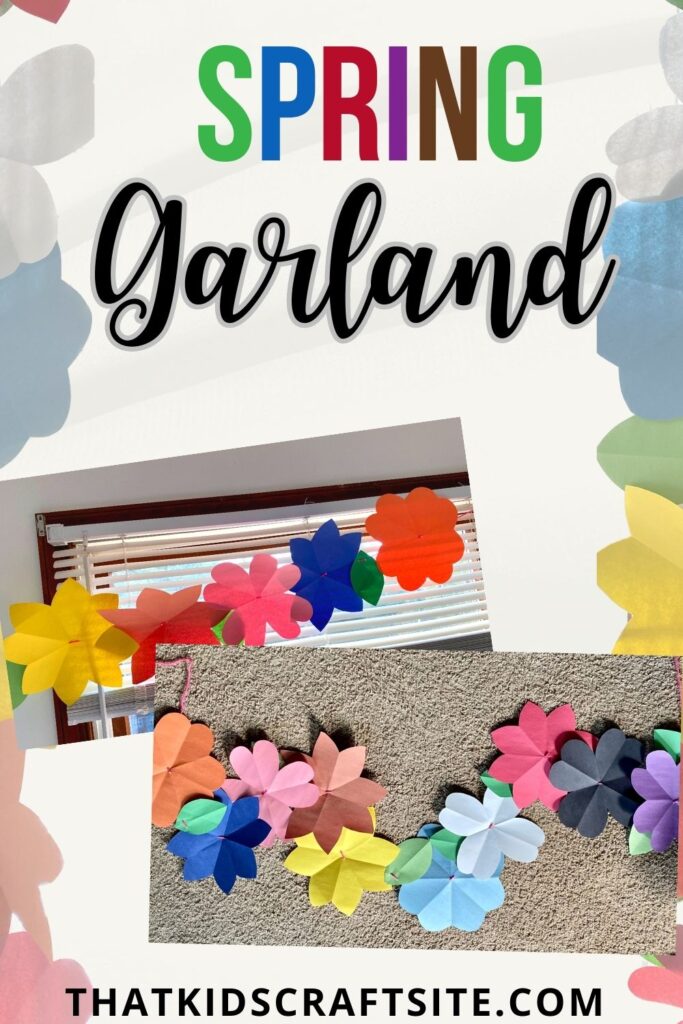
- With the embroidery needle, “sew” the paper flowers and leaves onto the string or yarn in an alternating pattern until you have a beautiful spring garland!
Note: For younger children, it may be helpful to use a hole punch and punch a hole into each flower and leaf to make stringing easier. That’s totally up to you and what you think will work best for your little crafters.

Craft a Spring Garland from Paper
This kid-friendly garland craft is a colorful way to welcome in the spring season. Overall, it’s a simple project that is perfect for small hands.
With colorful flowers and leaves, little makers will enjoy participating in this adorable spring paper garland activity.
Happy making!