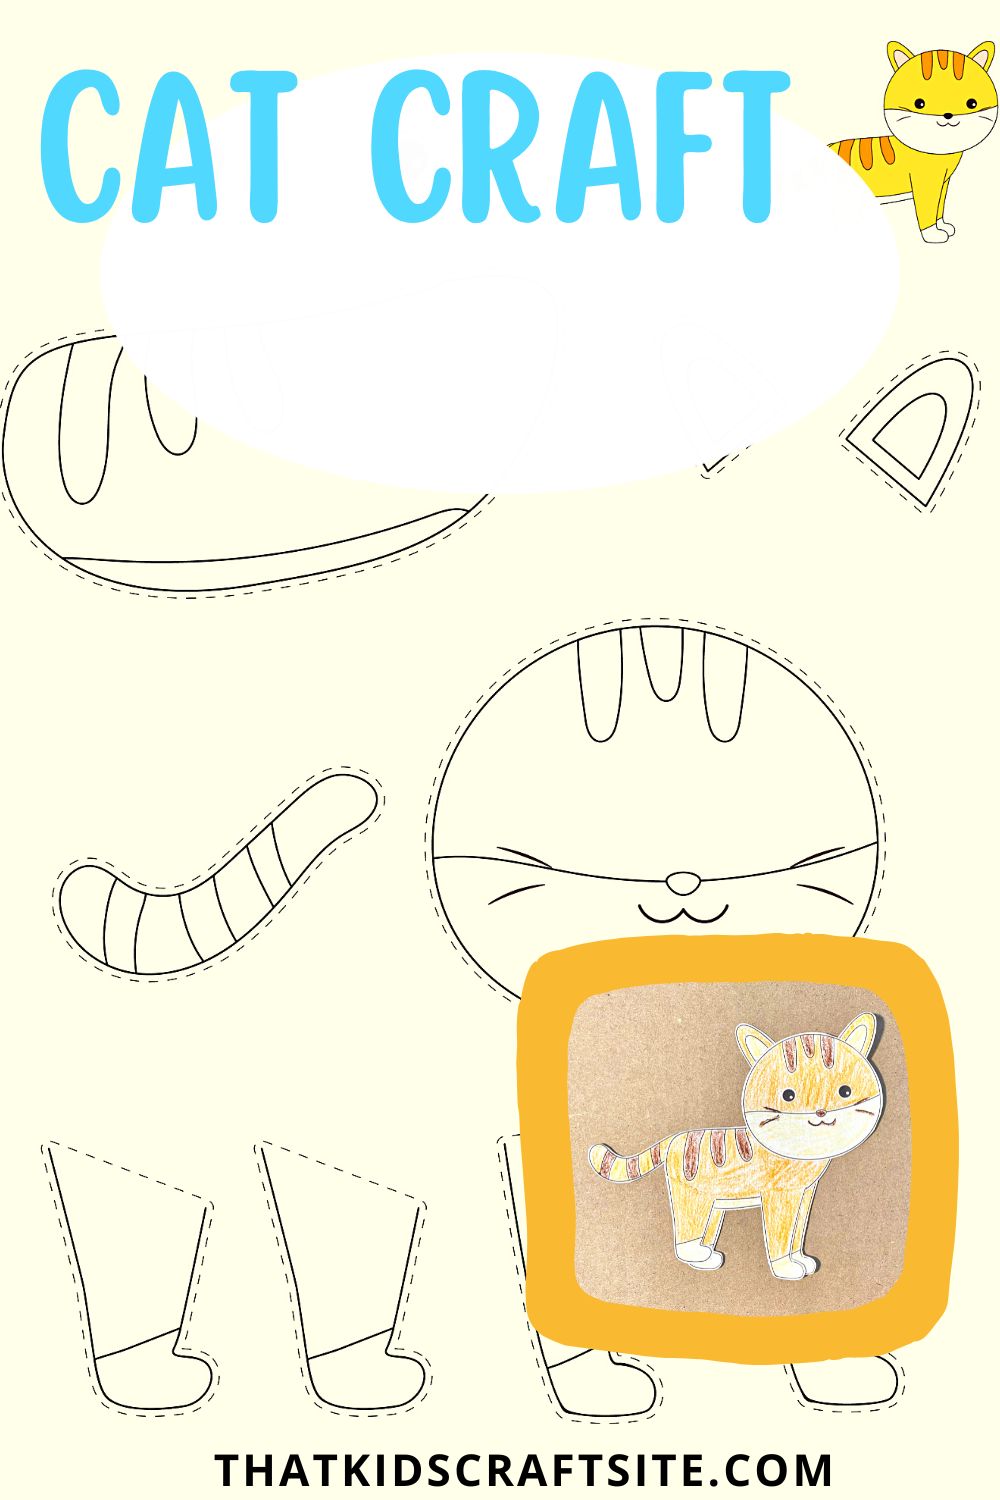
Cat Craft
Learn how to make the purrfect paper cat craft for kids!
Crafting is a fantastic way to unleash creativity and engage children in meaningful activities.
Paper crafts, in particular, are really popular activities for kids, as they are easy and affordable.
They also provide hours of entertainment, which is great for keeping active children occupied.
If you’re ready take your littles into the fabulous world of paper crafting, we have a great idea:
A cat paper craft!
It’s a simple project that is both exciting and entertaining!
Below, we will take you step-by-step on how to put together an adorable paper cat craft.
This project will bring smiles to both you and your little one’s faces.
Okay, let’s begin this purrfectly fun crafting adventure!

This article contains affiliate links to products that you might like.
Crafting a Paper Cat
Cat Craft Materials
Before jumping into the crafting process of a cute paper cat, make sure to gather the following materials:
- FREE cat craft template (available in our Freebies Library)
- Crayons or Colored Pencils
- Scissors
- Glue stick
- Googly eyes (optional)
- Black marker (optional)
Step-by-Step Instructions

Step 1 – Download and Print
Begin by clicking on our Freebies Library.
If you’re not already a member, it’s super simple to join…just put your email in.
Find the “cat craft” and print out the template.
This is a really great printable because you can print as many as you like, and it’s FREE!
Step 2 – Color in Your Cat
Using crayons or colored pencils, color in the different parts of the cat.
Encourage your child to use their imagination and create a unique and colorful kitty.
Step 3 – Cut Out the Cat
When all the parts are colored in, carefully cut out the pieces following the dotted lines.
It’s best to use a pair of kid-friendly scissors with rounded tips.
If needed, assist younger children with this step to ensure safety.
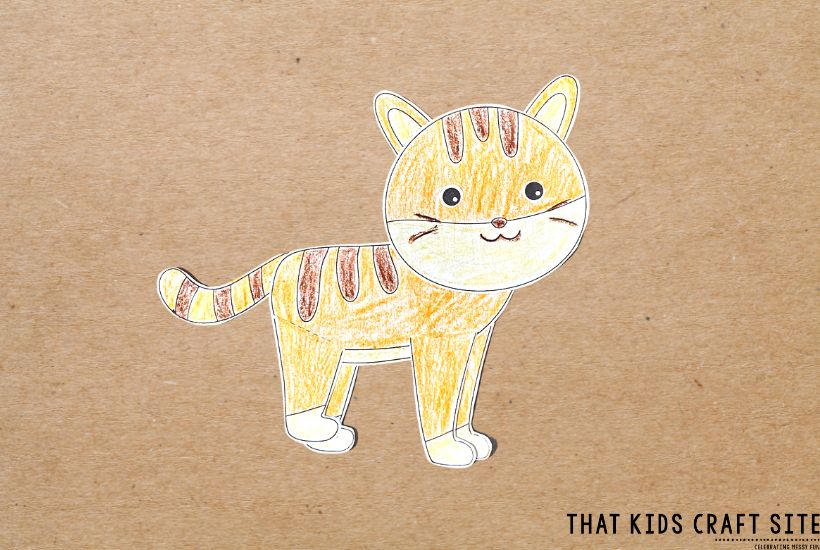
Step 4 – Assemble Your Cat Craft
Assemble the cutest cat ever by gluing all the pieces together with a glue stick.
We like to start with the head, gluing on the ears and eyes.
Then we move on, attaching the body, legs, and, finally, the tail.
Step 5 – Add Details
Once the glue is dry, encourage kids to add some exciting details.
They can use a black marker and define the cat’s facial features by making them bold.
Maybe they would like to add eyelashes or even some freckles.
Kids can also attach a pair of googly eyes for a fun and playful touch.
Another idea would be to add a whimsical kitty collar.
They could decorate it with shimmering stars or fabulous flower designs.
This is really a great opportunity for little ones to let their imaginations run wild.

That’s it!
Your paper cat craft is complete.
Now it’s time to display it or play with it!
Have fun!
A Paper Cat Craft for Kids
Crafting with kids is a wonderful way to foster their creativity and encourage imagination.
This adorable paper cat craft is an ideal project for little learners.
It offers young crafters an exciting activity and provides them with a sense of accomplishment.
As your children create their own unique paper cat, they will benefit in many ways.
They will develop their fine motor skills and explore their artistic abilities.
Kids will also build self-esteem and gain confidence with this incredible paper cat craft.
So, let’s get started on this purrfect crafting adventure and have fun with your little ones today!