Popsicle Perler Bead Patterns for Kids
Bring on summer with delicious popsicle Perler bead projects for kids!

The season of summer is right around the corner, and there’s nothing better than cooling off with a yummy popsicle treat or two!
As much fun as popsicles are to eat, they are also super fun to craft! Encourage kids to make popsicle Perler bead designs for a really great summertime activity!
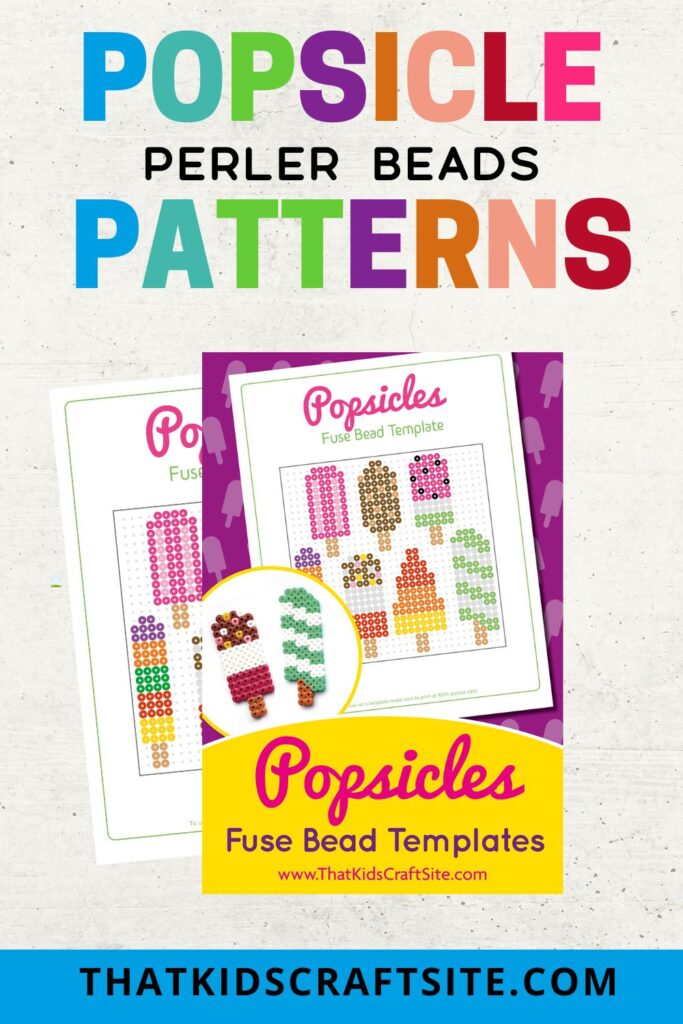
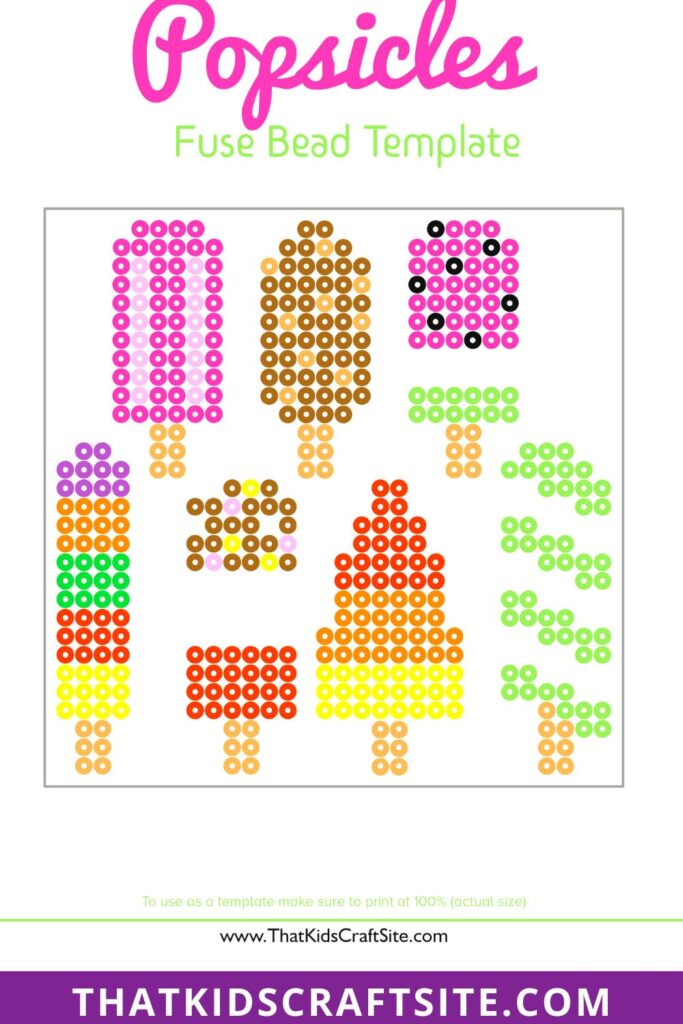
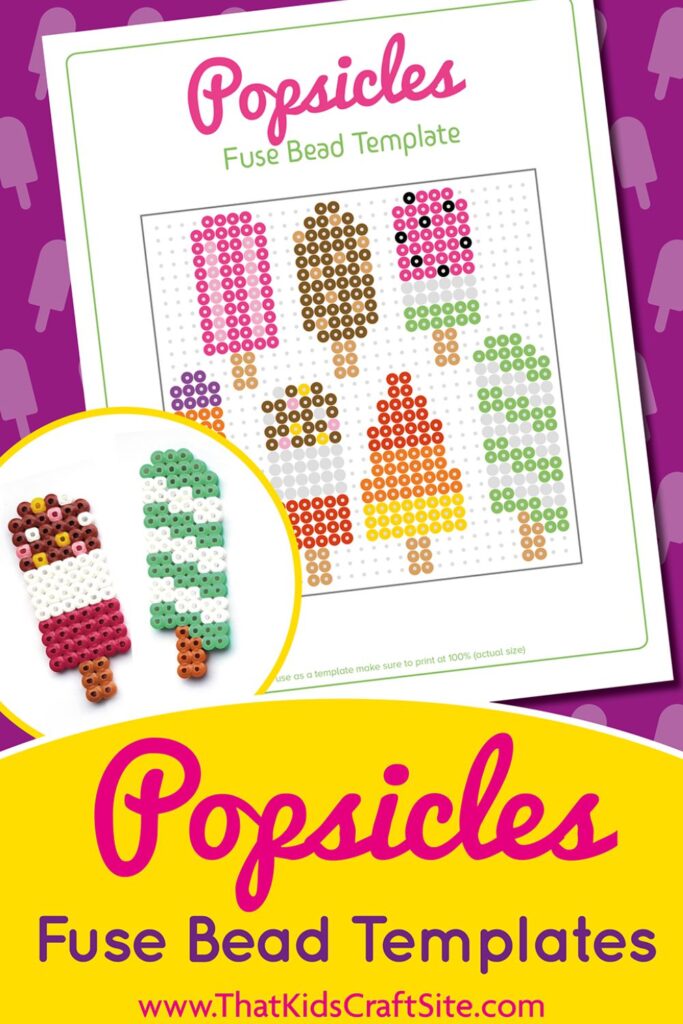
To create some of the most amazing fused bead popsicle projects, we have some wonderful printables for you.
With patterns for rocket pops, fruit pops, and more, our easy popsicle Perler beads templates are a perfect activity for any time of the year!
Head over to our Freebies Library to find the best popsicle fuse bead patterns!
This article contains affiliate links to products that you might like.
Kid-friendly Perler Bead Popsicle Crafts
Have fun in the sun with our bright and colorful Perler bead designs for popsicles. To complete awesome popsicle melty bead projects, there are only a few supplies that you will need.
Below is a list of materials that will make a variety of popsicle fused bead crafts.
Materials:
- Perler Beads
- Iron
- Ironing Board
- Parchment Paper
- Free Popsicle Fused Bead Template
- Perler Bead Pen Dispenser (optional)
- Perler Bead Pegboard (optional)
- Perler Bead Sweeper (optional for quick clean up)
Once you have all the materials, simply follow the steps below to make some of the tastiest Perler bead popsicles ever!
Instructions:
1 – Print out the FREE popsicle fuse bead templates on your printer.
2 – Take your Perler bead pegboard (or you can simply use a flat surface) and arrange the Perler beads to match the pattern. If you have the optional Perler bead pen dispenser, you can use that to help you place the beads accordingly.
3 – Once the beads look like the template, carefully lay a piece of parchment paper over top of the design to cover it.
4 – With the iron on medium setting and all warmed up, gently press the iron down onto the popsicle pattern to fuse the beads together. It helps to carefully move the iron in a slow circular motion to ensure that all of the beads melt to each other. Do this process for about 10-15 seconds or as long as needed to fuse all the beads.
Note: Your project is complete once one side is melted together; however, if you prefer, you can choose to fuse both sides of your project. This is your choice! Only one side needs to be fused in order for the project to stay together.
5 – Your yummy popsicle Perler bead project is done! You can keep it as is, add a string and hang it up, or you can even turn it into a keychain!
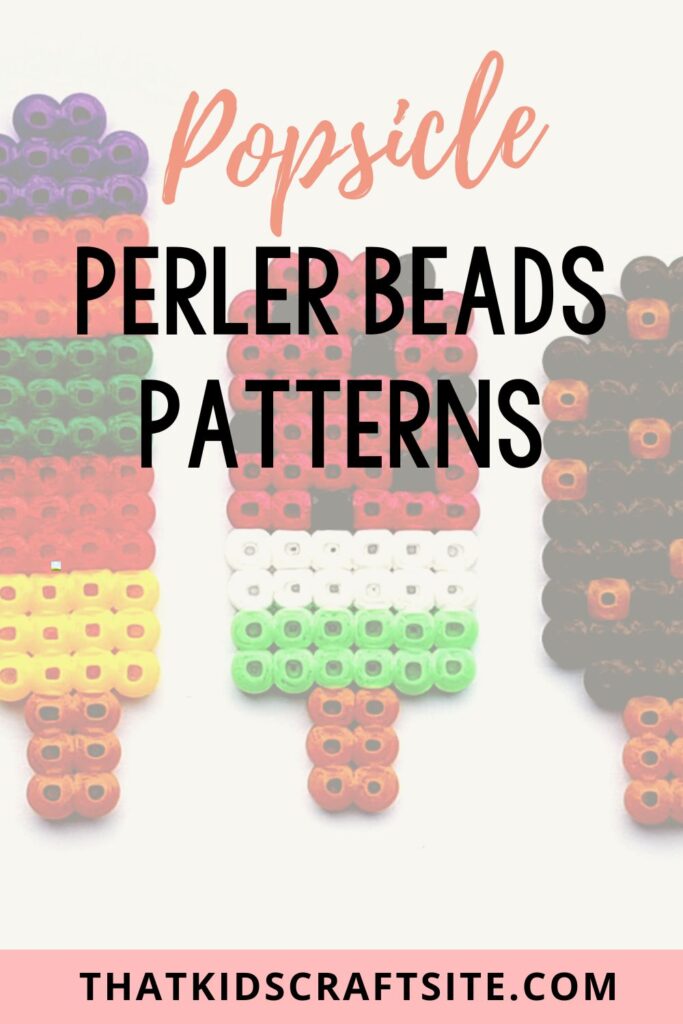
Perler bead patterns are great because they leave room for imagination to take hold. Use templates and match the patterns exactly or make unique designs that bring you joy! Don’t hold back!
Try using different colors than the template suggests or modify the way the beads layout.
However Perler bead templates are used, the important thing is to have a good time making your melty bead crafts!
Our favorite popsicle Perler bead designs use lots of different colored beads. For example, we chose brown beads, black and white pegs, red beads, and shades of pink to make our tasty treats!
Popsicle Fuse Bead Patterns for Children
When you’re feeling hot and want to chill out with a few popsicle fused bead patterns, head on over to our Freebies Library.
There you will find templates to make a number of different popsicle projects.
Our Perler bead designs are fun and easy, and they are the perfect activity for little ones on a hot summer day.
Happy Fusing!
Popsicle Perler Bead Patterns

Get ready for summer fun with these popsicle Perler bead patterns!
Materials
- Perler Beads
- Iron
- Ironing Board
- Parchment Paper
- Free Popsicle Fused Bead Template
- Perler Bead Pen Dispenser (optional)
- Perler Bead Pegboard (optional)
- Perler Bead Sweeper (optional for quick clean up)
Instructions
1 - Print out the FREE popsicle fuse bead templates on your printer.
2 - Take your Perler bead pegboard (or you can simply use a flat surface) and arrange the Perler beads to match the pattern. If you have the optional Perler bead pen dispenser, you can use that to help you place the beads accordingly.
3 - Once the beads look like the template, carefully lay a piece of parchment paper over top of the design to cover it.
4 - With the iron on medium setting and all warmed up, gently press the iron down onto the popsicle pattern to fuse the beads together. It helps to carefully move the iron in a slow circular motion to ensure that all of the beads melt to each other. Do this process for about 10-15 seconds or as long as needed to fuse all the beads.
Note: Your project is complete once one side is melted together; however, if you prefer, you can choose to fuse both sides of your project. This is your choice! Only one side needs to be fused in order for the project to stay together.
5 - Your yummy popsicle Perler bead project is done! You can keep it as is, add a string and hang it up, or you can even turn it into a keychain!
You May Also Like…