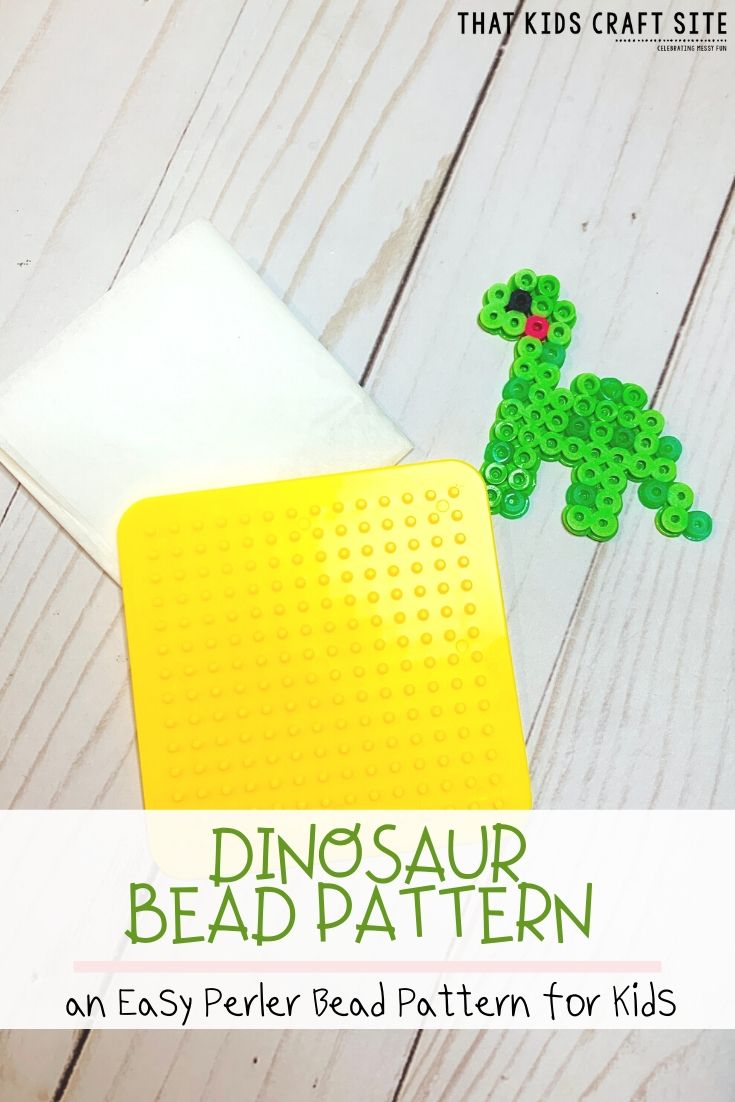
Dinosaur Perler Bead Pattern
This easy dinosaur Perler bead pattern is perfect for kids who love their dinos!

Dino Perler Patterns
When my boys were little they loved all things dinosaur and all things trucks. They had these two giant books that were filled with everything you could ever want to know about each topic. Those poor books got a good workout!
So, when we were thinking about new easy Perler bead patterns to make, a dinosaur Perler seemed like a great idea!
This pattern is quick and easy and uses four colors of beads. We chose to use more traditional dinosaur colors, but you can totally choose fun colors so your dinosaur stands out.
Want a rainbow dinosaur? Go for it!
Want a pink and purple dinosaur? Sure thing!
As with all Perler bead patterns, your creations are limited only by your own imagination.
This article contains affiliate links to the items that will help you make the craft.
How to Make a Dinosaur Perler
Making your dino Perler shouldn’t take but a few minutes. Although we pretty much have Perler pattern creation under control here, even we were able to rock this dino out in just under five minutes.
One of the reasons I love this easy pattern is because it’s a great entry pattern for kids who are just learning how to use Perler beads. Like a lot of crafts, creating things with these melty beads takes some practice but when kids are invested in their projects it makes it a lot easier and a lot more fun.
For this pattern we used:
- a square Perler board (as we usually do for our projects!)
- bead tweezers
- light green beads
- green beads
- pink beads
- black beads
You can grab a free copy of the Dinosaur Perler Bead Pattern here when you sign up for our newsletter.
If you don’t have pink, you can either skip the little cheek blush or use red instead. We just prefer the look of the pink over the other colors.

As always, I highly recommend having the bead tweezers. I know it may seem like an unnecessary tool, but once you try creating using tweezers you will wonder why it took you so long to get them! This pack of tweezers is what we use and what’s lasted us forever. They’re very durable!
You Might Also Like: Easy Dinosaur Plush Toy
We always start creating our Perler bead patterns by printing out the template and setting up our colors.
You can grab a free copy of the Dinosaur Perler Bead Pattern here when you sign up for our newsletter.

We like to start from the bottom and count up, so we started with the dinosaur’s feet. If you’re working with a 15×15 board (typically the smaller square board size), count over two pegs from the right and start your dinosaur on the third peg. This leaves enough room for the dinosaur’s head at the top of the pattern.
Follow the pattern and, once all of the beads have been placed, carefully put down your wax ironing paper and iron your pattern.
Congratulations on making your Perler bead dinosaur!
Have fun and enjoy your dino Perler!