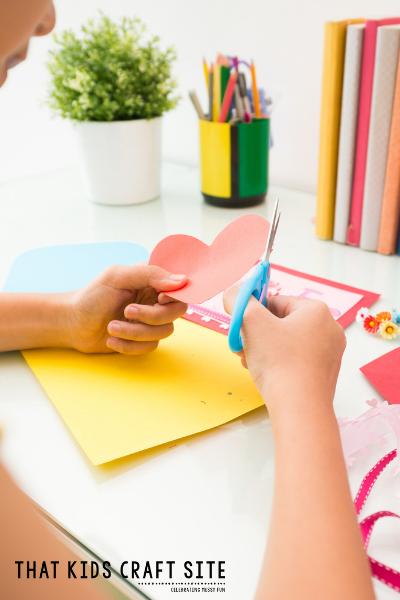
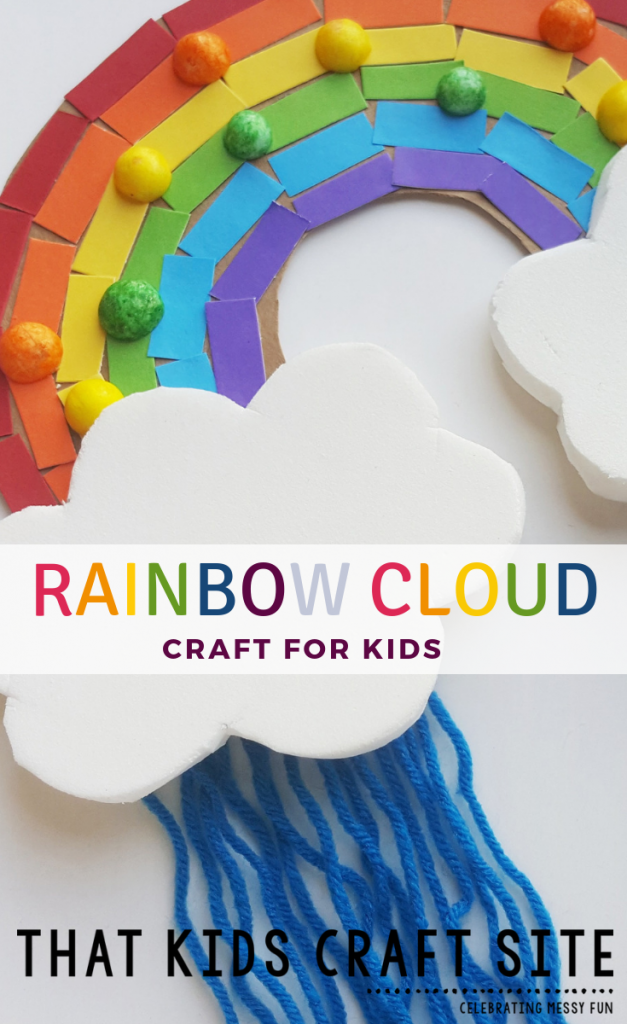
Rainbow Cloud Craft
This Rainbow craft for kids is perfect for preschoolers!
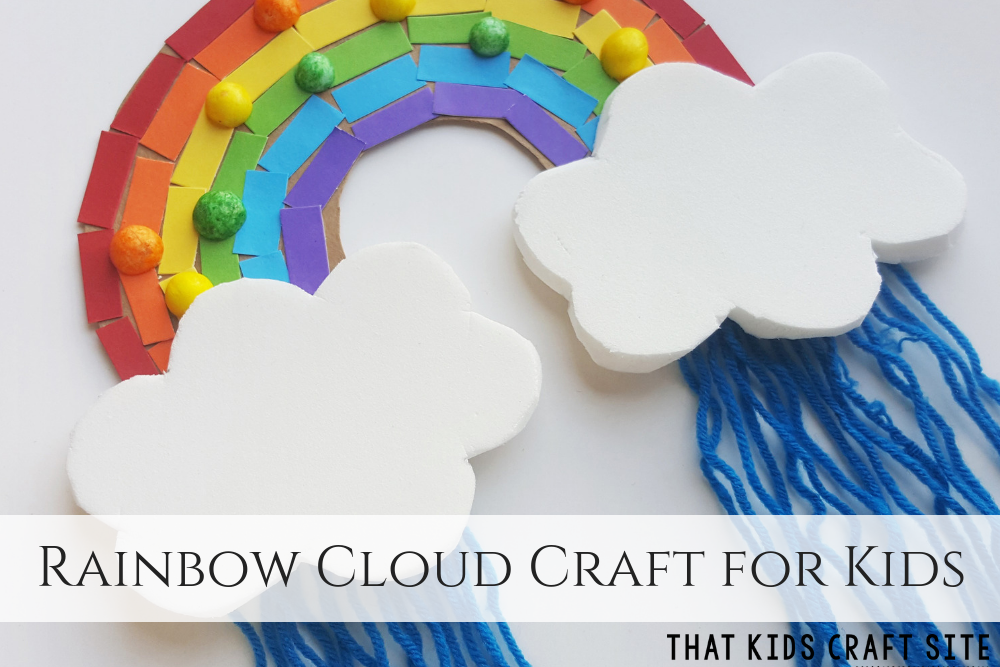
Rainbows always make us happy, so this rainbow craft is a must-make if you’re feeling a little gloomy! The free, printable template makes it even easier to create and the variety of textures are a hit with preschool crafters everywhere.
Rainbow Craft for Kids
Age: Preschool +
Time Needed: 30 minutes
Supplies:
- Construction Paper in Rainbow Colors (scraps work great!)
- Cardstock
- Pencil – for tracing template
- Craft Glue
- Scissors
- White Craft Foam
- Blue Yarn
- Template – PRINT IT HERE
Directions:
1. Trace the cloud pattern from the template on a piece of craft foam;use regular use the pencil to trace the pattern.
Tip: You can use white cardstock paper for the clouds if you want to use regular school glue, but the clouds look nicer if you trace them on white craft foam. If you use the craft foam, you have to use the craft glue or they won’t stick to anything.
2. Cut out the traced cloud patterns using scissors. You will need two clouds for this craft.
3. Grab all of your colorful construction paper scraps, because it’s time to use them! Select rainbow colors (red, orange, yellow, green, blue, violet). Trace the small rectangle from the template on the craft papers and cut them out using scissors.
4. Determine the length for the rain part and cut a bunch of yarn strands to the desired length. Use any shade of blue for the yarn (rain).
5. Use cardstock paper or cardboard for the rainbow base. Trace the rainbow base on the selected material and cut it out.
6. Grab the paper
7. Keep adding the colorful rectangles until the whole rainbow base is filled.
8. Now apply glue along the bottom ends of the rainbow base and attach one end of the yarn strands on the glued part. Overlap about 2 cm of the yarn strands with the rainbow base while attaching them. Warning: This part gets a bit messy, so
9. Glue the cloud cutouts on the rainbow base. Glue one cloud on each side.
Have fun adding more details with beads, glitters, pompoms, or anything you want! Enjoy!
Share Your Creation!
We’d love to see how your rainbow cloud craft turned out! Snap a picture and tag us on Instagram @ThatKidsCraftSite! We can’t wait to celebrate your messy fun!
Preschool Craft Printable
Want to print out this craft and take it with you to scouts or school? Simply click the Print Now button below and you’ll be able to easily print it out!
Preschool Rainbow Cloud Craft
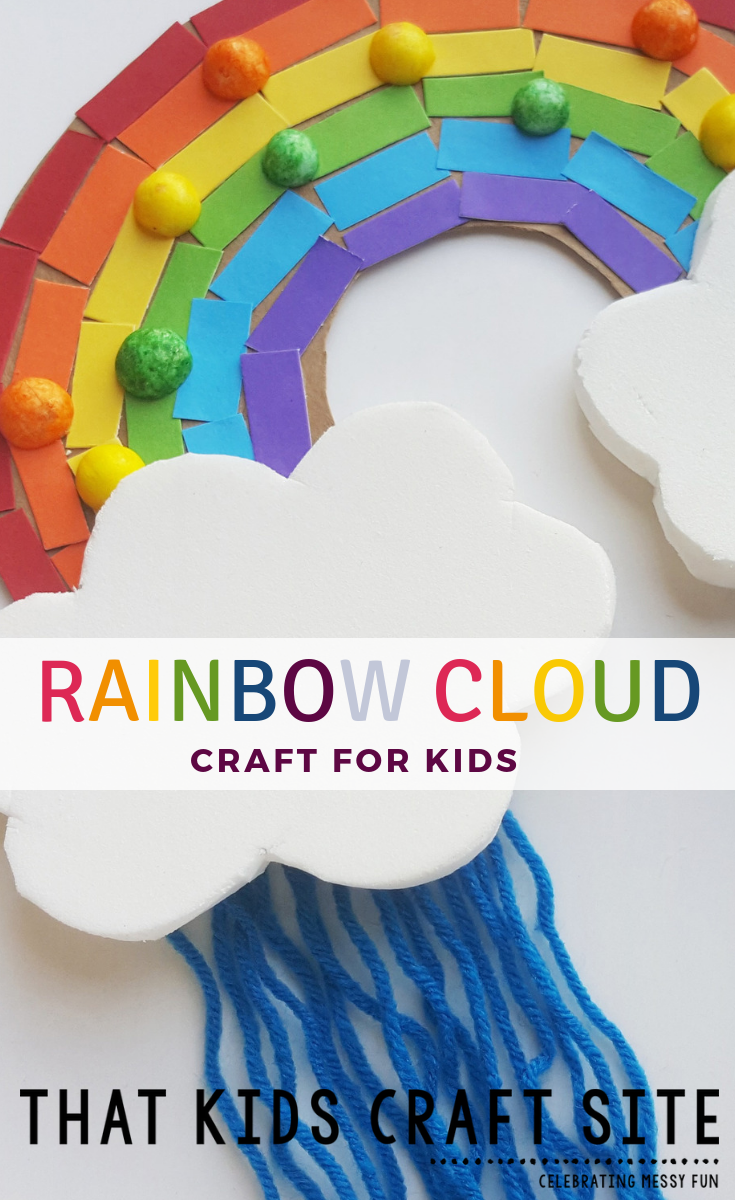
This fun preschool rainbow craft makes the perfect addition to any rainbow study - or as a way to brighten your day!
Materials
- Rainbow Cloud Printable Template
- Construction Paper
- Cardstock
- Craft Glue
- White Craft Foam
- Blue Yarn
Tools
- Scissors
- Pencil
Instructions
1. Trace the cloud pattern from the template on a piece of craft foam; use the pencil to trace the pattern.
Tip: You can use white cardstock paper for the clouds if you want to use regular school glue, but the clouds look nicer if you trace them on white craft foam. If you use the craft foam, you have to use the craft glue or they won’t stick to anything.
2. Cut out the traced cloud patterns using scissors. You will need 2 clouds for this craft.
3. Grab all of your colorful construction paper scraps, because it’s time to use them! Select rainbow colors (red, orange, yellow, green, blue, violet). Trace the small rectangle from the template on the craft papers and cut them out using scissors.
4. Determine the length for the rain part and cut a bunch of yarn strands to the desired length. Use any shade of blue for the yarn (rain).
5. Use cardstock paper or cardboard for the rainbow base. Trace the rainbow base on the selected material and cut it out.
6. Grab the paper cut outs and start to stick them on the rainbow base. Start either from the top end or bottom end of the rainbow base. This is a great step for building fine motor control in little hands!
7. Keep adding the colorful rectangles until the whole rainbow base is filled.
8. Now apply glue along the bottom ends of the rainbow base and attach one end of the yarn strands on the glued part. Overlap about 2 cm of the yarn strands with the rainbow base while attaching them. Warning: This part gets a bit messy, so roll up those little sleeves!
9. Glue the cloud cut outs on the rainbow base. Glue one cloud on each side.
Have fun adding more details with beads, glitters, pompoms, or anything you want!
Notes
If you'd rather use school glue instead of craft glue, be sure to switch up the foam and use construction paper instead. School glue and foam don't work together too well.