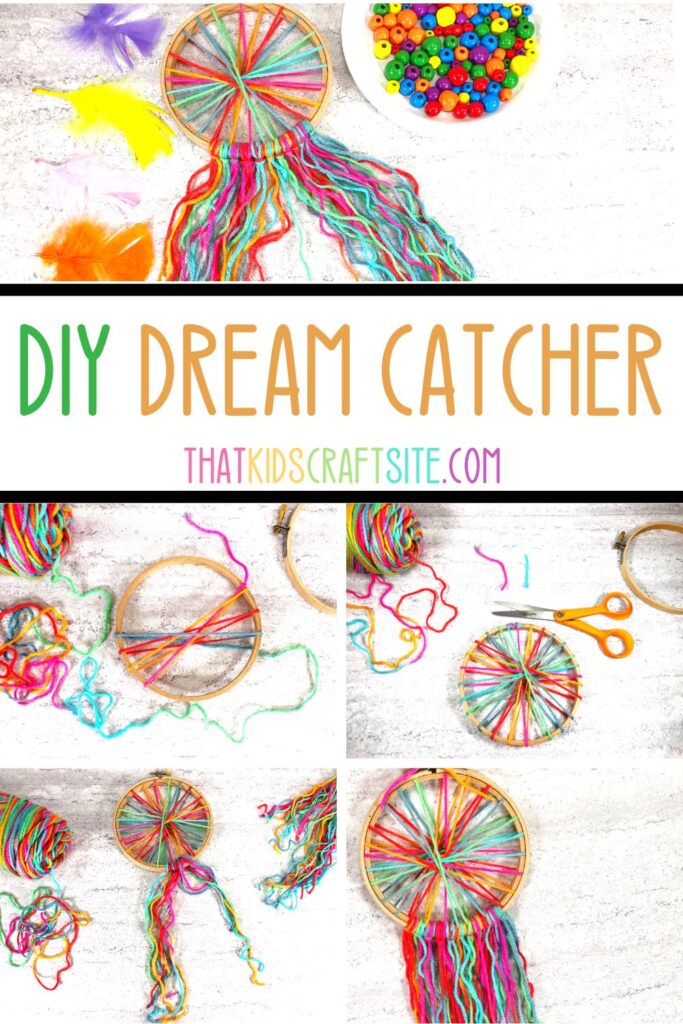
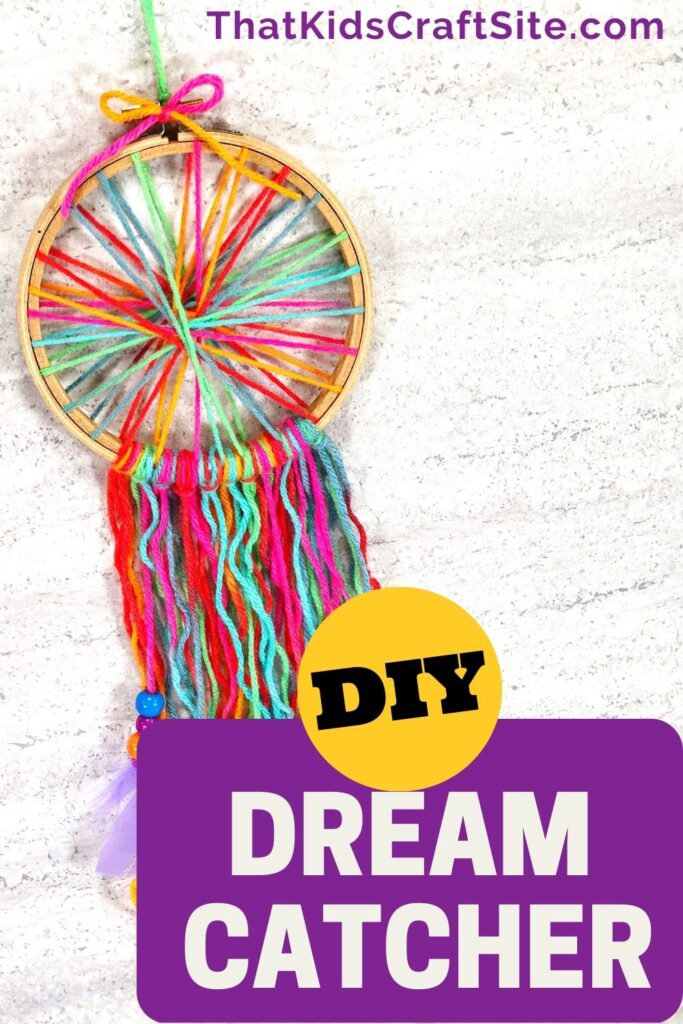
DIY Dream Catcher
Fun, colorful, and easy to make, this pretty dream catcher will keep all the bad dreams away!
One of the most alluring symbols to come from Native American culture is the dreamcatcher. Believed to be a source of protection from bad dreams, dreamcatchers are typically hung above the cradles or beds of young children.
The beautiful hoop and web design of a dreamcatcher is said to “catch” all of the bad dreams that float in the air, allowing only the good dreams to pass through the feathers and down to the child. In the morning, the sunlight destroys all of the bad dreams caught in the dreamcatcher’s web.
Encourage little ones to create their own delightful dream catcher. While this craft is perfect for kids who may have trouble sleeping or are experiencing nightmares, it’s also a wonderful activity for those who are not.
Join us as we walk you through the steps for you and your little ones to make this DIY dreamcatcher craft.
Make Your Own Dream Catcher Craft
How to Make a Dream Catcher
Materials:
- Acrylic Yarn (we like Red Heart Bright Stripe for this project)
- Bamboo Embroidery Hoop
- Colored Wood Beads
- Colorful Craft Feathers
- Ruler
- Scissors
Instructions:
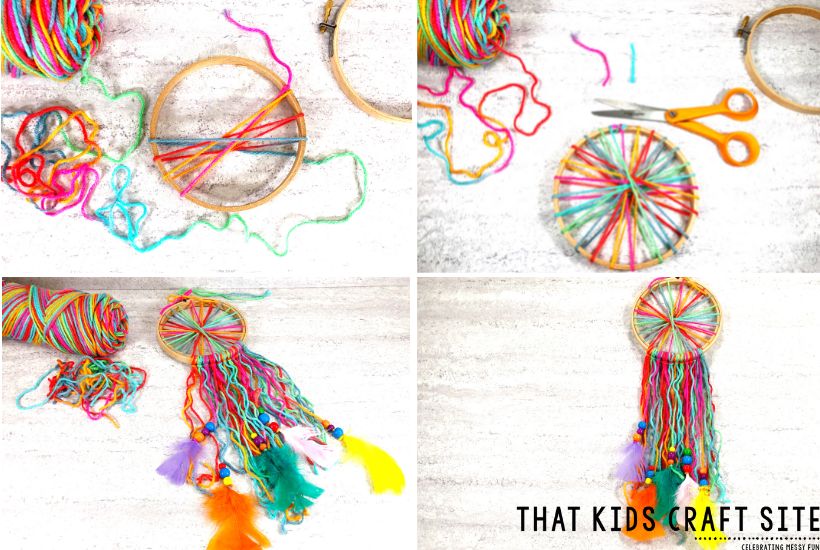
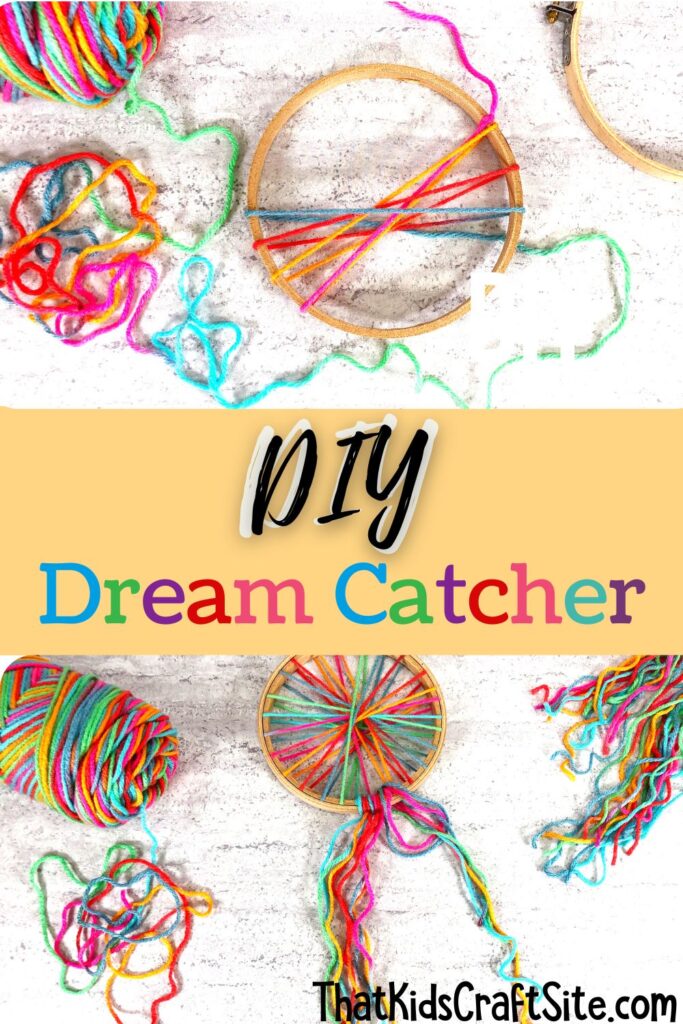
- Taking the embroidery hoop, loosen the screw at the top to separate the two rings.
- Working with the inside ring only (the smaller ring of the two), secure the end of the yarn around it at any point by making a double knot.
- Trim the tail end of the yarn as close to the ring as possible.
- Wrap the yarn around the outside of the ring, working all the way around the hoop in a circular motion.
- Once complete, make a double knot to secure the yarn in place and trim the tail.
- Put the inside ring back into the outside ring to complete the hoop and tighten the screw.
- Using your ruler, measure and cut a piece of yarn that is 24” long. Do this a total of 24 times for 24 pieces of yarn that are 24” long.
- Taking 2 pieces of yarn at a time, attach them to the bottom of the embroidery hoop with a Lark’s Head knot. A Lark’s Head knot is made first by folding the yarn in half and placing the loop under the hoop. Next, bring the loop around to the front and pull the pieces of yarn through the loop to tighten it around the ring.
- Repeat 11 more times, working each knot next to the last.
- Select the pieces of yarn you’d like to add a feather to and string several wooden beads onto the ends.
- Using a double knot, tie a feather to the end of the strings with beads and then slide the wooden beads down over the feather’s quill.
- Measure and cut a 12” piece of yarn. Secure it to the screw with a Lark’s Head knot and tie the ends together with a double knot.
- Measure and cut another 12” piece of yarn. Tie this piece of yarn around the screw, making a pretty bow. This last step is optional.
DIY Dream Catcher for Kids
This quick and easy dream catcher craft for kids will bring sweet dreams all night long. Once complete, hang the beautiful dream catcher over or near the bed. They can also be placed above doors, in windows, on the porch, or wherever you feel it should be. Now that you know how easy it is to make a dream catcher, go get crafting! Happy Making!