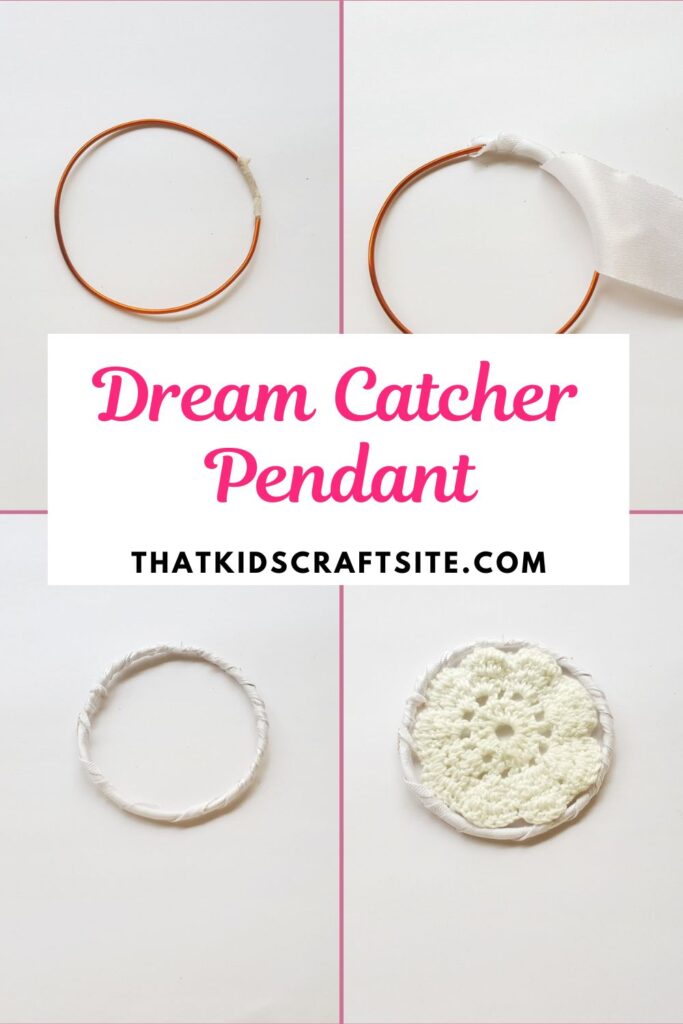
Dream Catcher Pendant
Learn how to craft a beautiful DIY dream catcher pendant for kids!
Dream catchers are magical talismans popular in Native American culture.
Made from string and feathers, they are commonly hung above children’s beds to protect them from bad dreams that may come their way.
Turn an amazing catcher of dreams into a wearable pendant for your kids.
A simple dream catcher necklace is a great way to encourage good thoughts and positive vibes.
Not only that, but it’s fun, trendy, and, best of all, handmade!
Get all the good feels with a delightful DIY Native American dream catcher pendant that you can craft with your favorite little learners.
It’s especially timely to make one if you’re doing unit studies about Native Americans and their customs and cultures!
Keep reading to learn how to craft a dream catcher pendant for kids!

This article contains affiliate links to products that you might like.
DIY Dream Catcher Pendant
Making a dream catcher pendant is a really fun activity for little learners (and older kids, too!).
It stimulates creative thinking and boosts imagination, as well as builds self-confidence.
Completing a magical dream catcher necklace is a simple project for even the youngest of crafters.
Create your own beautiful dream catcher by gathering the materials from the supply list and following the instructions below!
Supplies:
- Mini Crochet Doily
- Satin Ribbon
- Feathers
- Quilting Thread
- Sewing Needle
- Jewelry Wire
- Pliers
- Sticky Tape
- Scissors
- Hot Glue Gun
- Hot Glue
- Pony Beads
- String

Instructions:
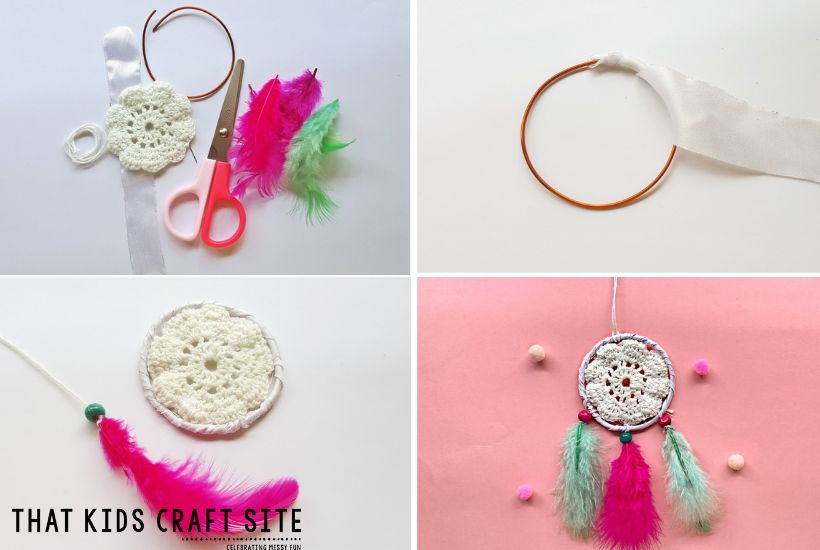
- Using the craft wire and pliers, carefully form a circle that has the same size circumference as the doily. It helps to form the wire around a cup or another rounded object to get the best circle.
Note: The wire circle needs to be a smidge bigger than the doily in order to make the dream catcher.
- Close the ends of the wire together by using sticky tape.
- Wrap satin ribbon all the way around the entire ring to cover the wire. Then secure the ends with hot glue.
- Next, place the crochet doily in the middle of the ring.
- Attach the outermost points of the doily to the ring by sewing them to the wire with the needle and thread.
- Put that aside, and then tie a piece of string to the stem of a feather.
- Add a bead or two by sliding them down the string and onto the stem of the feather.
- Hold the bead, feather, and knotted string in place by securing them all with a drop of hot glue.
- Attach the feather to the dream catcher using the same piece of string.
- Repeat the string, bead, glue process and add as many feathers as you would like to the dream catcher.
- String the dream catcher pendant on a long piece of ribbon or string to make it wearable.
That’s it! The magical DIY dream catcher pendant is complete. You did great!

Making a Dream Catcher Pendant
Making a lovely dream catcher pendant is an easy and engaging activity for children of all ages.
It is cute, charming, and makes for an adorable fashion piece that goes with every outfit.
The dream catcher that’s pictured has bright colors for a cheerful look.
If you’d rather have a more subtle look, go for more natural, organic, or earthy hues when selecting supplies.
Whatever colors you and your littles decide to use for this fabulous dream catcher, it will most surely be simply amazing!
You May Also Like…


