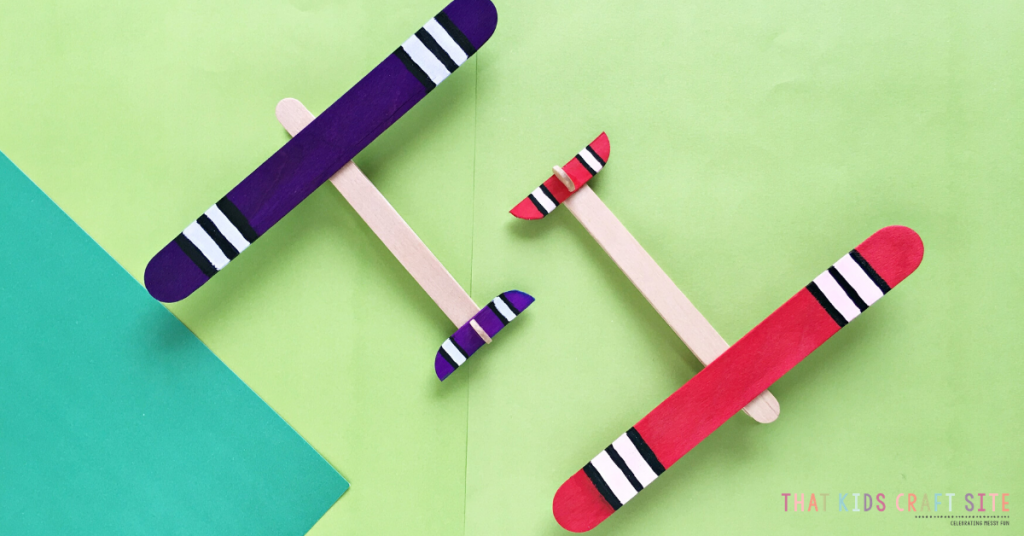
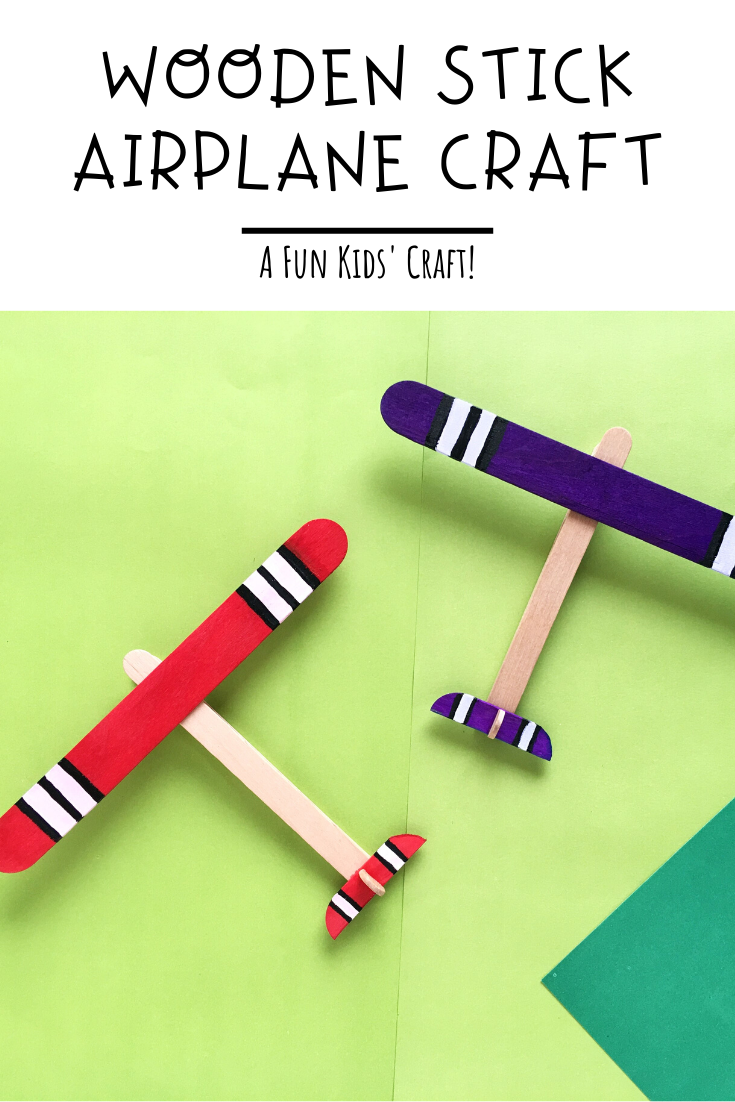
Wooden Stick Airplane Craft
Get creative and put those wooden sticks you have laying around to use with this cute Wooden Craft Stick Airplane Craft and get ready to see your kids on cloud nine!
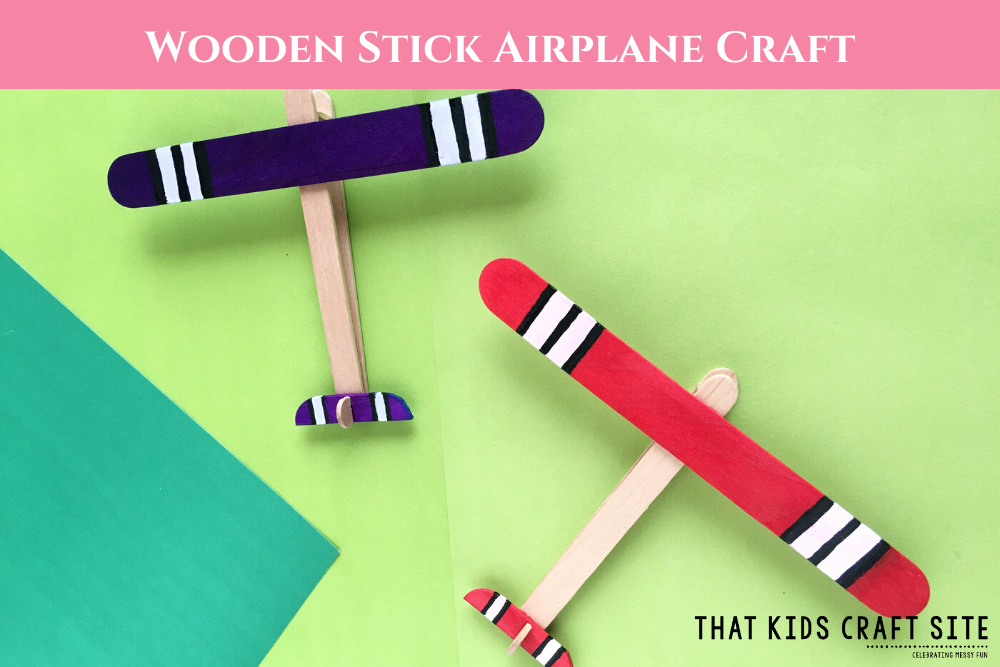
Wooden Craft Stick Airplane Craft
If you have a future little pilot in your family you’ll probably know how exciting and heart-warming it is to see them playing with anything aircraft themed.
One of my kids was so into planes growing up that he used to turn random objects into jets and pretend he was the pilot. I’m talking paper, spoons, toy cars, you name it! It’s such a fond memory to me now that he’s older and was actually the inspiration for this cute craft. It also gave me a reason to use up the ton of wooden sticks I had from other craft projects!
This craft is a wonderful way to make your aircraft-obsessed preschoolers happy and excited! They won’t just have a colorful new toy but they can be part of the process to make it and decorate it with their favorite colors and even some stickers. How cool is that!?
Airplane Craft for Preschoolers
The best part about this cute craft? It’s simple and you only need a few materials to start this project.
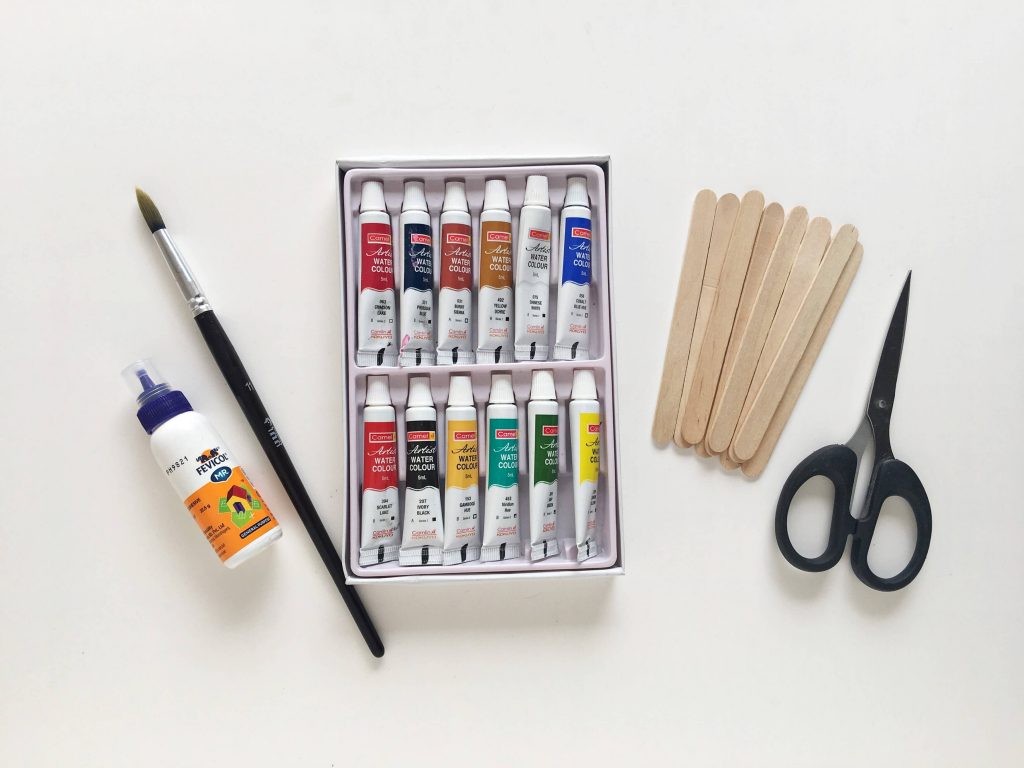
You’ll just need to gather the following supplies:
SUPPLIES
- Wooden craft sticks
- Scissors
- Glue
- Paint
- Paintbrush
- Ruler
How to Make a Wooden Craft Stick Airplane Craft
After you’ve gathered all of your supplies, you just need to follow the step-by-step directions below and make your own airplanes.
Instructions:
Step 1:
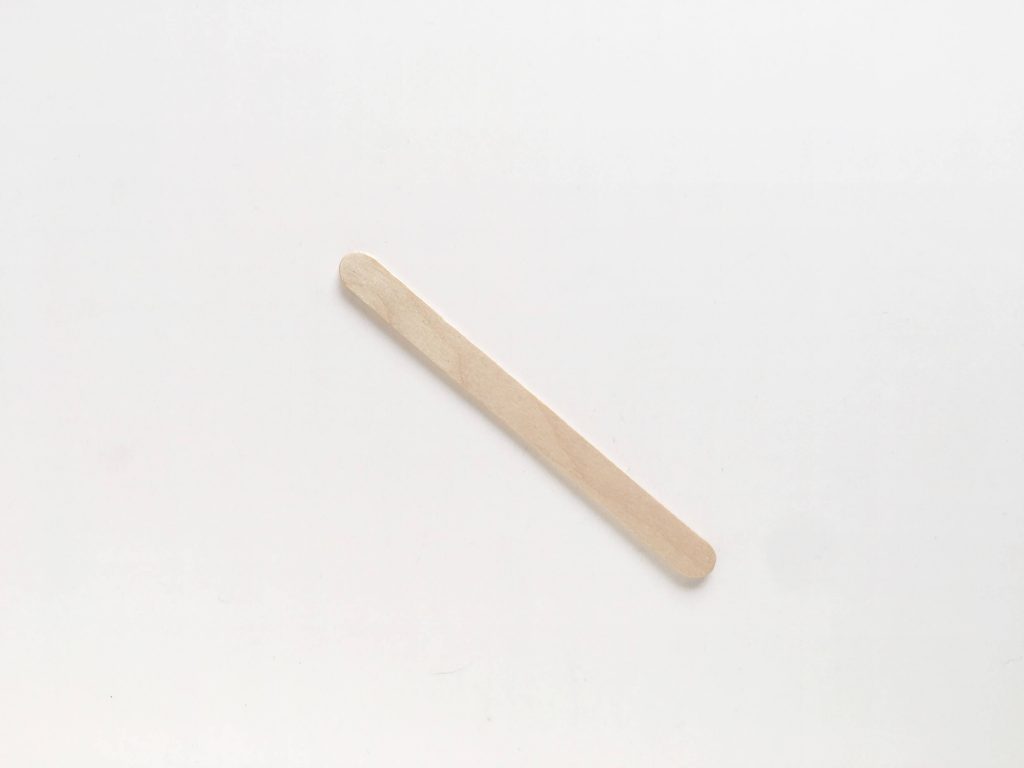
To make the wooden stick airplane craft, gather all of the listed supplies. Start with one wooden stick at first.
Step 2:
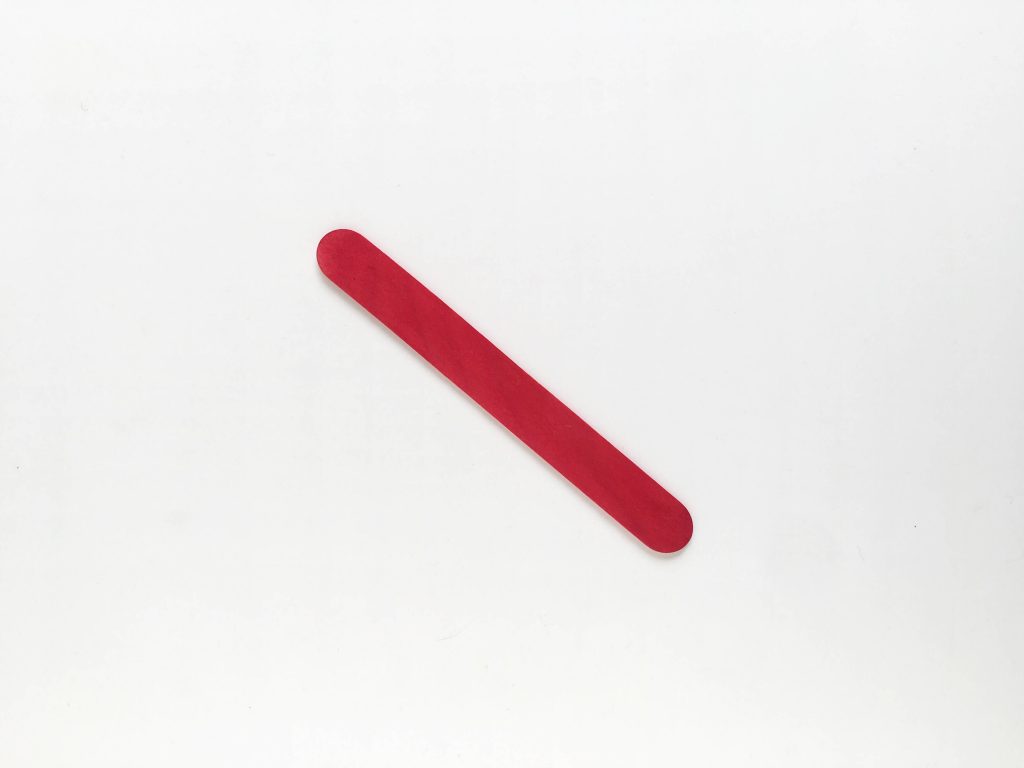
Paint one of the sticks red. Allow the paint to dry completely.
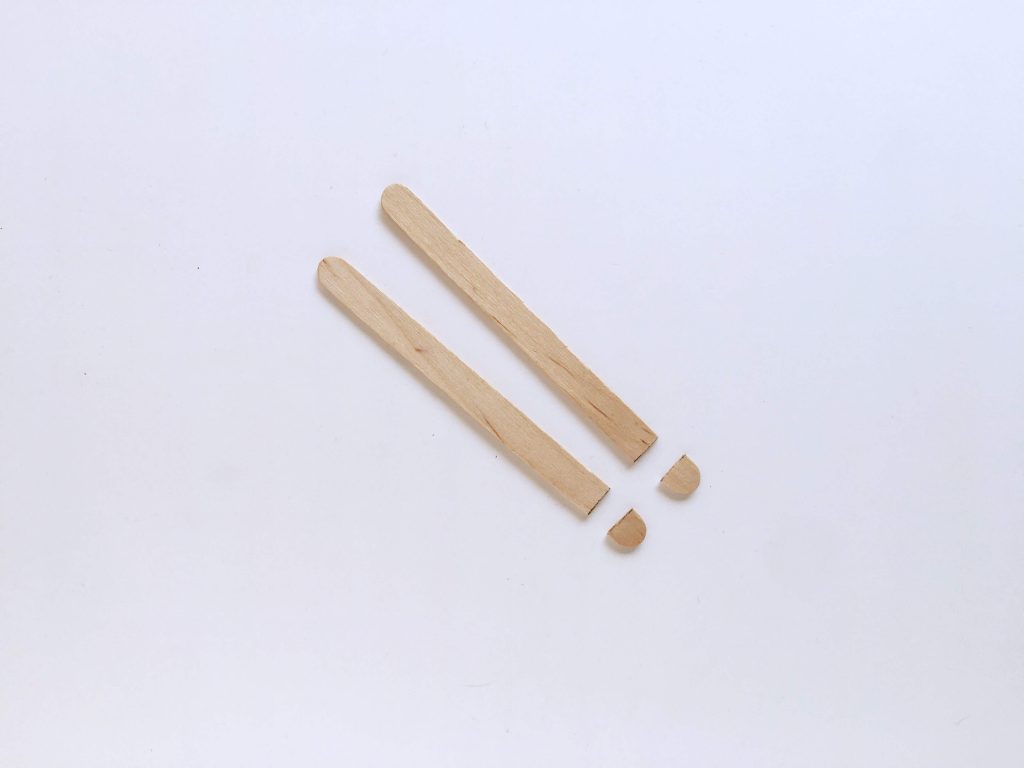
Step 3:
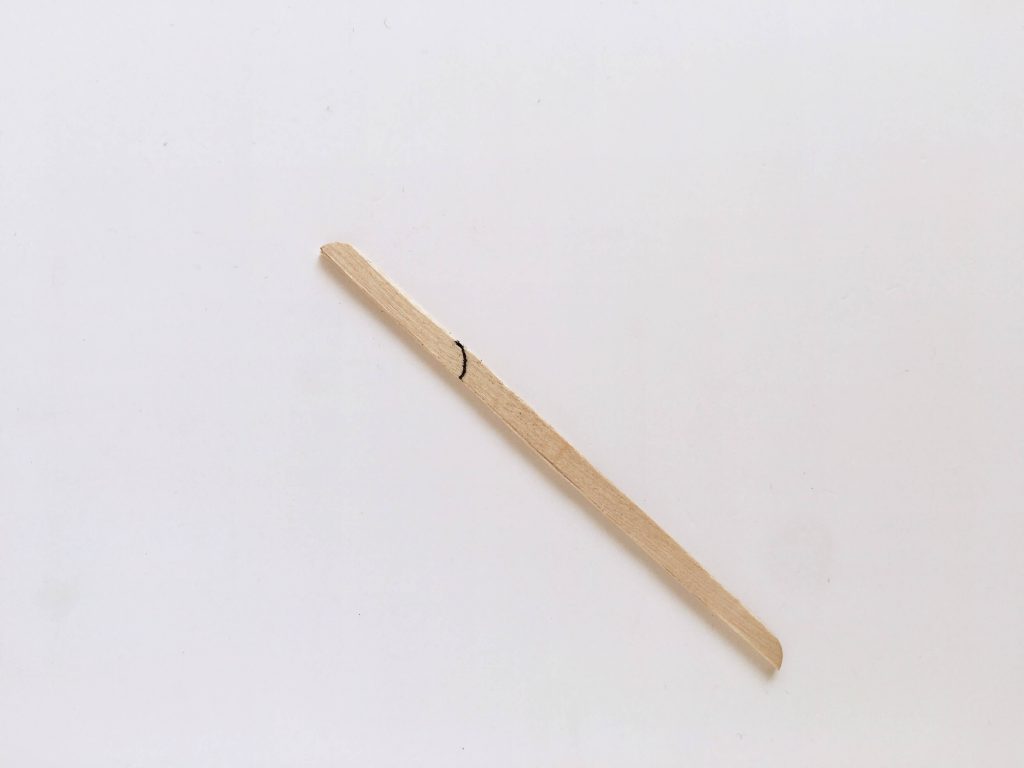
While the paint is drying, take another stick and cut it in half vertically. Measure 3 or 4 centimeters gap on the stick and then draw a curved line there. Make sure the curved line is similar to the curve on the other end of the stick.
Step 4:
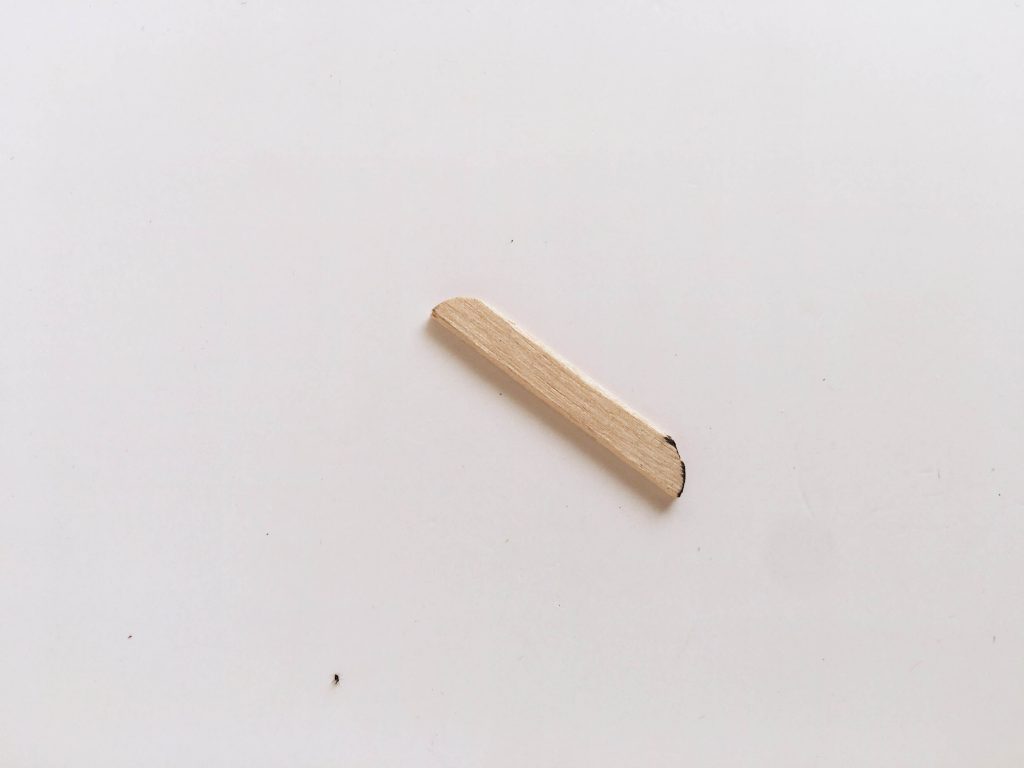
Cut the stick along the curved line. This piece is going to be our plane’s horizontal stabilizer.
Step 5:
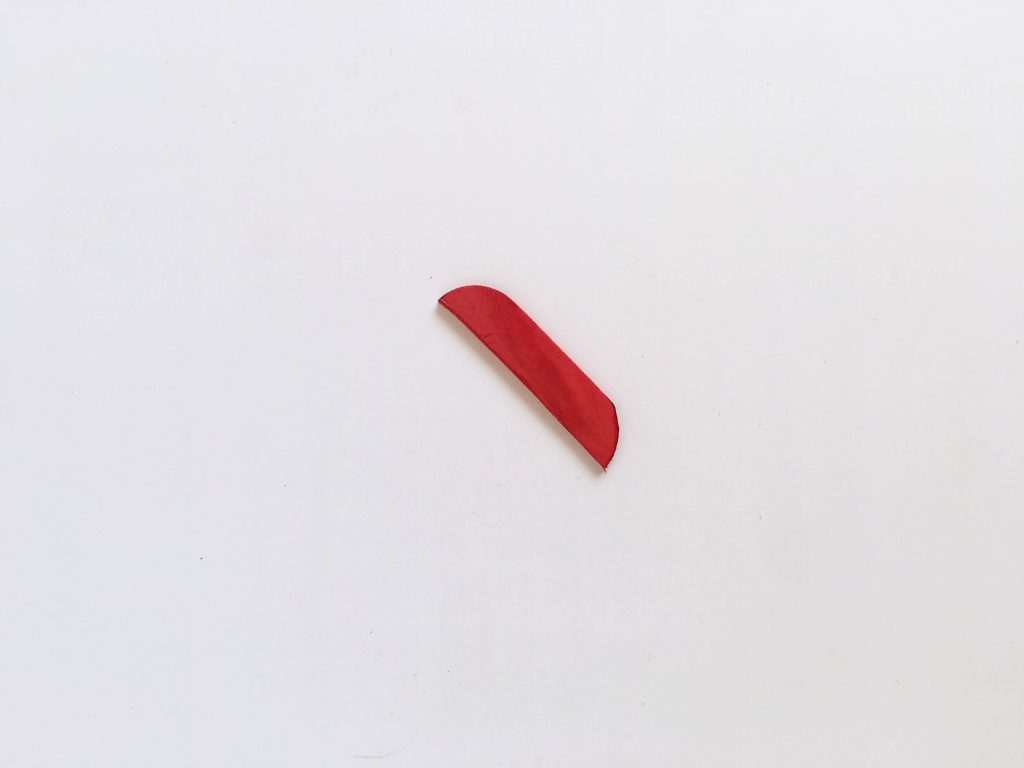
Now paint the horizontal stabilizer and leave it to dry.
Step 6:
Take two more sticks and cut off the top 1-2 cm of the sticks.
Step 7:
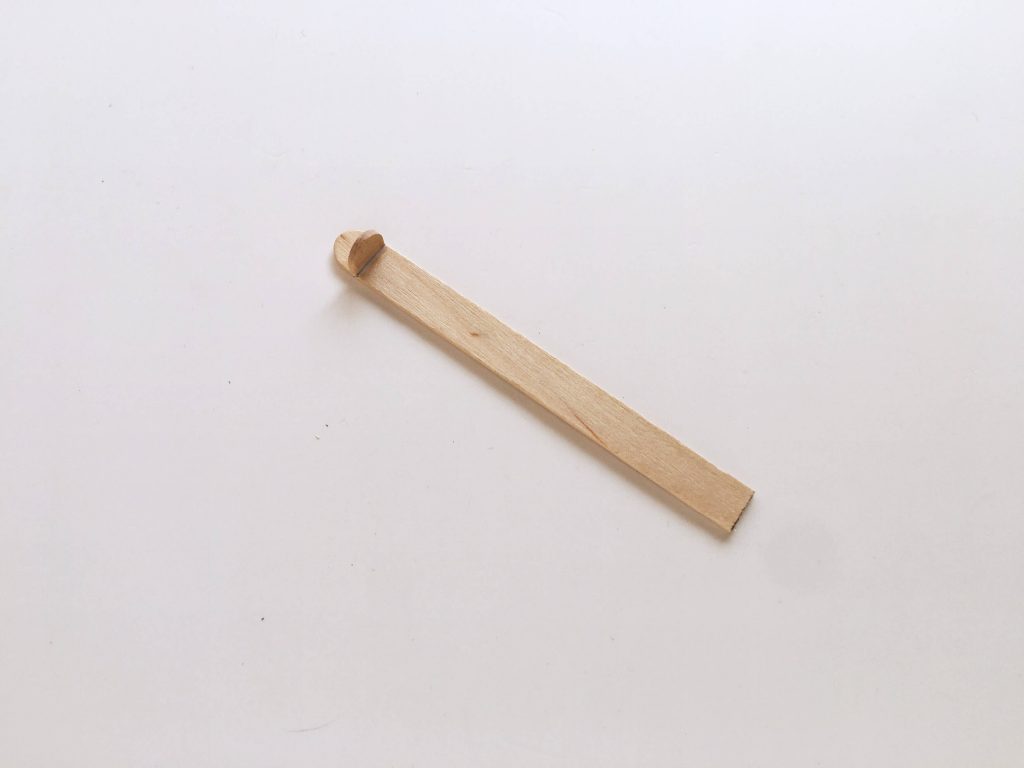
Take one of the sticks and the small cut out and glue the cut out on the flat side of the stick.
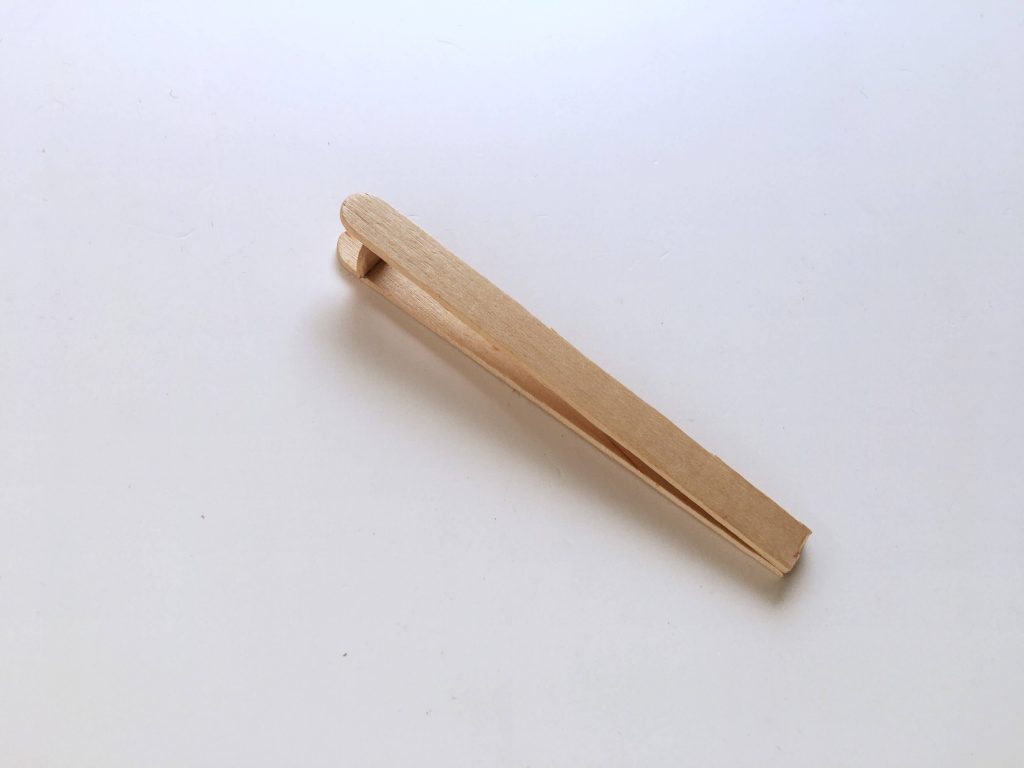
Step 8:
Take the other stick and place it on top of the previous stick. Glue the top of the stick on the small piece and glue both ends of the large popsicle sticks together. Allow the glue to dry.
Step 9:
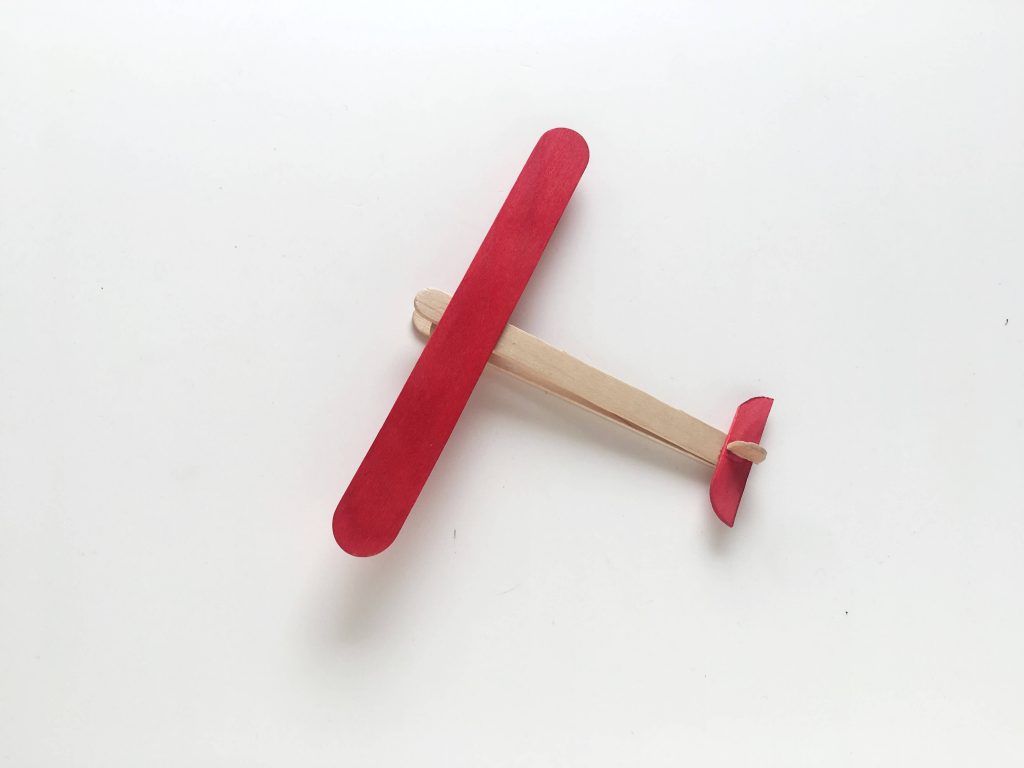
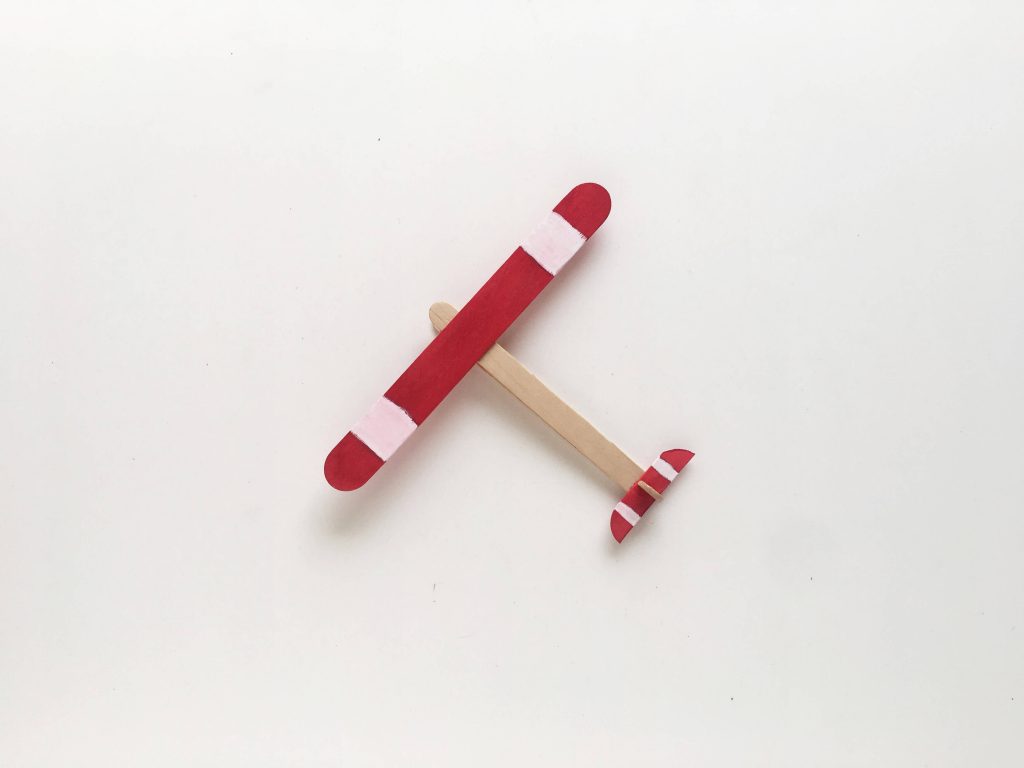
Glue the red popsicle stick horizontally over the body of the airplane. Then take the remaining small cut out from step 6 and glue it on the horizontal stabilizer. Then glue the whole piece on the end of the airplane’s body.
Step 10:
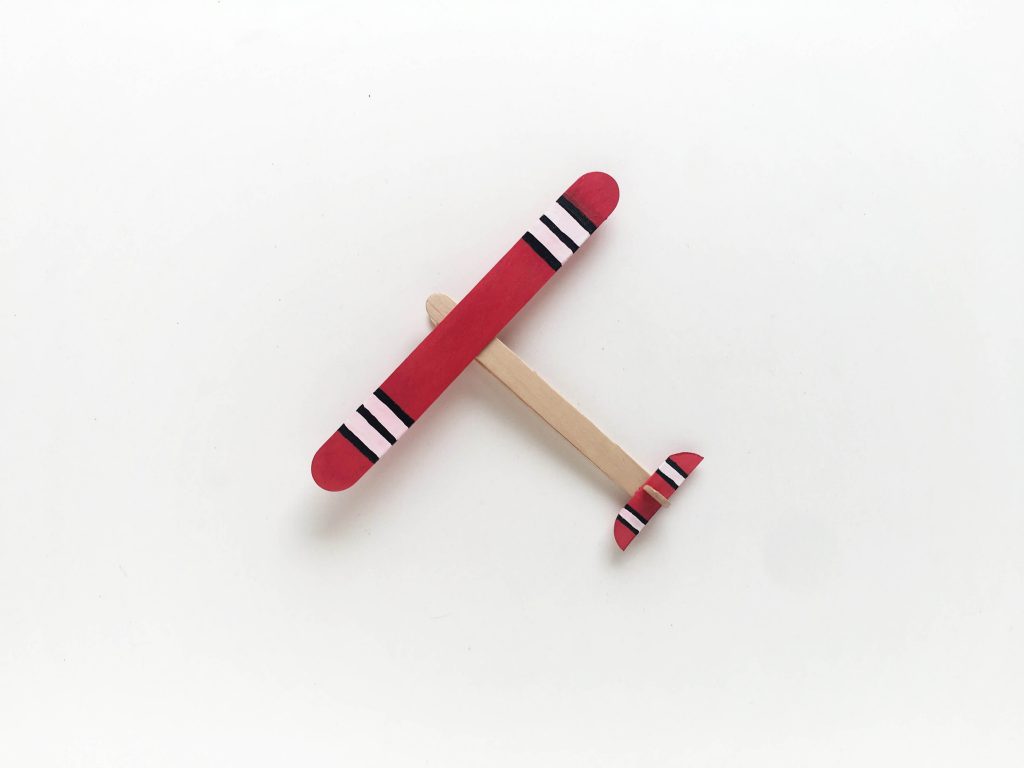
To decorate the plane, take some white paint and a paintbrush. Paint a 1 inch stripe on both sides of the plane’s wing. Allow the paint to dry.
Step 11:
Use a thin paintbrush and black paint to draw small lines over the white paint to finish off the decoration.
There’re so many situations where these little airplane crafts could come at handy! Preschoolers will love it so it could work amazingly in a homeschool class or even at a playdate if you want the kids to stay inside.
Have fun and enjoy the flight!
You Might Also Like These Other Crafts for Kids
- Transportation Crafts for Kids
- Dr. Seuss Crafts
- Cool Kids Superhero Masks
- Penguin Crafts for Preschoolers