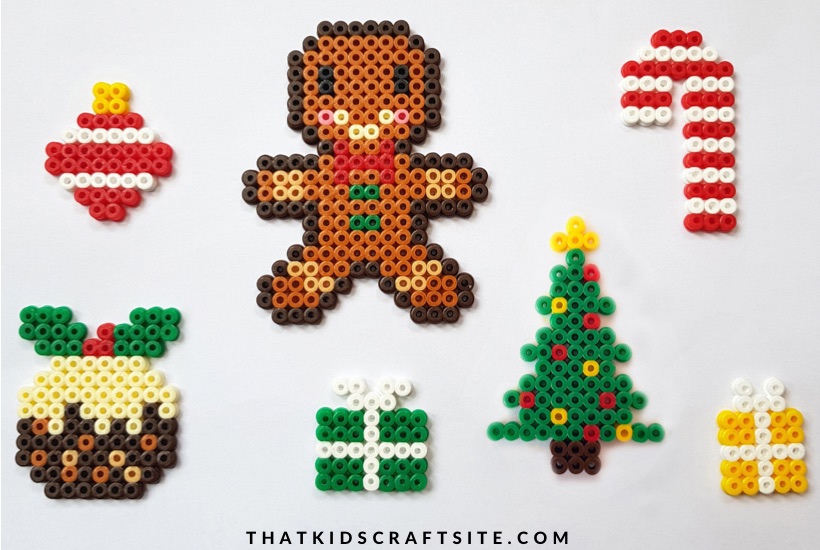
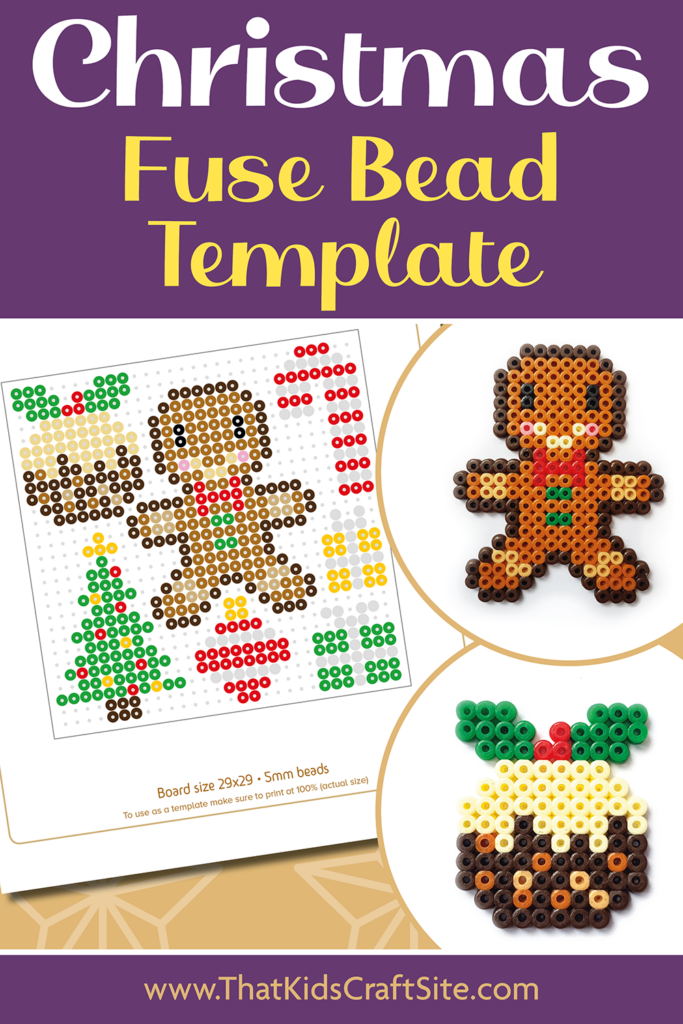
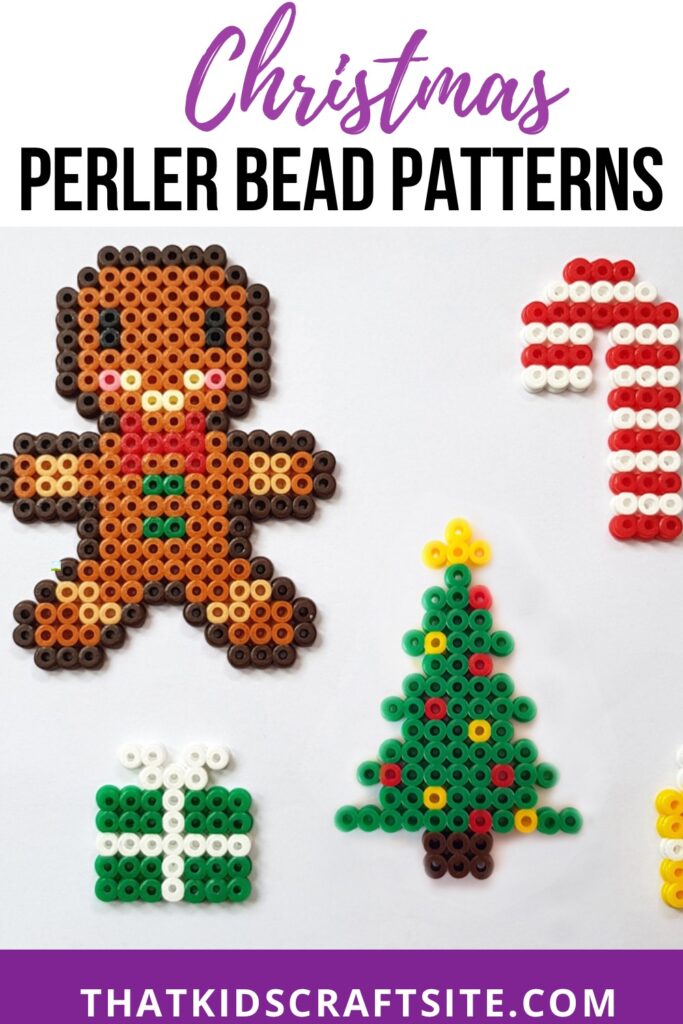
Christmas Perler Bead Patterns
Make your Christmas spirit come alive with these fun Christmas Perler bead patterns! Whether you are looking to create a Christmas tree or a gingerbread man… this craft is sure to spread some cheer!
Fun Perler Bead Patterns for Christmas
Let your imagination run wild as you create your own Perler bead crafts this holiday season!
Not only are these Christmas Perler bead patterns fun to look at… they are also easy to make and require minimal supplies!
These pieces of Perler bead art can be enjoyed long after they are created – attach them to hooks and use them as ornaments or even tie them with ribbon to add a homemade touch to your gift wrapping this holiday season!
Things You Need to Make the Christmas Perler Bead Patterns
To make these Perler bead patterns you will need:
- Christmas Perler Beads
- Red Perler Beads
- Deep Green Perler Beads
- Lime Green Perler Beads
- White Perler Beads
- Brown Perler Beads
- Tan Perler Beads
- Yellow Perler Beads
- Our Easy-To-Follow Printable/Download —–> Find it in the Freebies Library! Sign-up below if you’re not already a member.
- Peg Board Tray
- Ironing Paper or Wax paper
- Tweezers (optional but highly recommended)
- Iron (for adult use only)
How to Create Your Festive Christmas Perlers
Be sure to gather all the supplies you need before starting this fun craft! Print out our easy-to-follow printable for whichever Christmas Perler bead pattern you like… or print them all and make your own plethora of Christmas creations!
Place the peg board tray in front of you. Use the free printable as a guide to place your Perler beads, you can start wherever you like on your peg board!
Follow colors on the grid of the printable with your Perler beads or allow your imagination take reign and use whatever colors you want! If you do decided to use these Christmas Perler bead patterns as ornaments or gift tags… you can color coordinate the beads with the other ornaments on your tree or your wrapping paper!
Once you have the Perler beads placed where you like, carefully take a piece of wax paper and place it over the top of your Christmas design.
Now it’s time to ask an adult to heat the iron to medium heat. Medium heat works best for us, but be sure to do what works best for you!
An adult will need to gently iron the beads. Place the iron over the wax paper and begin to press down lightly. Be careful not to press down too hard, it can cause the beads to melt too much and give an overflowed effect.
Hold the iron in place for about 15-20 seconds depending on the heat your iron is producing.
Once your beads are totally melted on that side, take the iron and wax paper off of the beads carefully. If your beads aren’t totally melted together, just reapply the wax paper and go over them with the iron again.
Once that side has cooled enough to touch, carefully take them off of the tray. Turn your beads over to the unmelted side and place wax paper over that side. Then repeat the steps for melting your beads.
Once that side is melted and cooled, remove the wax paper and enjoy your beautiful Christmas Perler bead pieces.
The best tip we have for making these Christmas Perler bead patterns… is to have fun! Enjoy the time you and your family spend together as you create your own holiday crafts!
Grab Your Free Christmas Perler Bead Patterns
Sign up below to get your free Christmas Perler bead patterns! They are in the Freebies Library and a link will be emailed to you!